This last weekend hubby and I tackled what we thought might have honestly been the impossible. And that's funny seeing as how we were terrified to redo our kitchen! We started the laminate flooring install and are a little less than half way done with the entire house (all 630sq ft that we plan to cover)!! I can not begin to express to you how much I am in love with my new floors... they are so beautiful. And the best part is the nasty stained up Berber is OUT!
Here are a few things we used that I recommend you buy or borrow before you get started:
Flooring, of course! - we bought Home Legend Brazilian Cherry from HomeDepot.com for $.99/sqft
Underlayment appropriate for your subfloor type - We used Roberts 630 sq. ft. of Harmony Premium 3-in-1 Underlayment for Laminate and Wood Floors that I purchased from Amazon.com for half the price it is listed for at Home Depot. We have a wood subfloor.
Floor leveling compound appropriate for your subfloor type - We used a Henry brand self-mix bag. It was last minute when we realized a spot in the hallway was way too uneven to put flooring over. I had to trowel a bunch on to make a more level surface for the flooring to go over.
A laminate flooring pull bar and wall spacers - You can find that stuff in a kit for less than $20 that also comes with a tapping block. I highly recommend a 2x4 about maybe a foot long instead of the tapping block. We happened to use a scrap we had.
Door jamb saw - you may need this to cut those pesky door jambs for your flooring to fit under.
Rubber mallet
Table saw
Saw Zaw - This came in super handy for the vents.
T-molding for door ways
Quater round - If you are like me and do not remove the base boards prior to installation, quarter round will be necessary to cover the gap between the floor and the base board.
A bar of soap - Yes. A bar of soap. You would be amazed at how much that helped when we first got started. By running the soap along the edges of the tongues and grooves it allowed us to fit the pieces easier when we were working on the first few runs of the flooring. Good spur of the moment idea and I happened to have some Ivory on hand!
Thursday my mom, Bryan and I did the fun part of emptying out and moving our large shrunk from the living room in to our bedroom. It was the only room in the house that we could fit the pieces. Downside = we couldn't sleep in our bed at all for the next 4 nights.
(Keep in mind during this entire install process the couch had to be left in the room because of its size)
Friday night we started ripping up carpet. It did sound easy at first (for a newbie)... almost fun. That is until you start to see those spike strips all around the edge of the wall, then pull up the padding and see all the staples you have to pluck from the floor. That was probably a 3 or so hour process with 2 people.
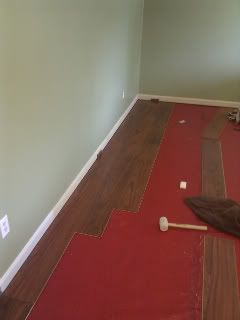
As you can see, the guys (hubby and my mom's hubby) started to get the hang of it. You can also see where we only ripped up half the carpet. Once enough flooring was laid they were able to move the couch over and finish the de-carpeting process.
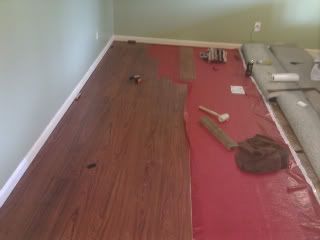
I had to work Saturday so didn't get to see past the first couple rows of laid flooring. Bryan was sure to send me little pic updates a few times which is mostly what you see above. When I got home later that evening this is what I saw:
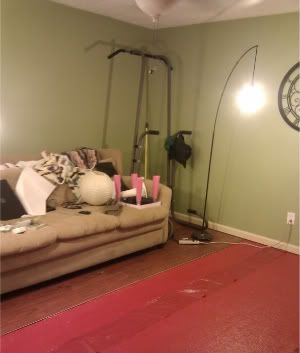
Over the next two days, Bryan and I were able to complete the living room and hallway all by ourselves. I thought we made a fantastic team! We were cruising along, working through obstacles and minor problems that would come up. I really truly enjoyed our DIY time together.
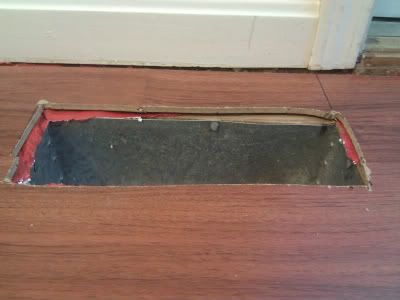
Here is a vent hole we created. That was really a test of our brain and math skills lol. Thank the Lord for the Saw Zaw!
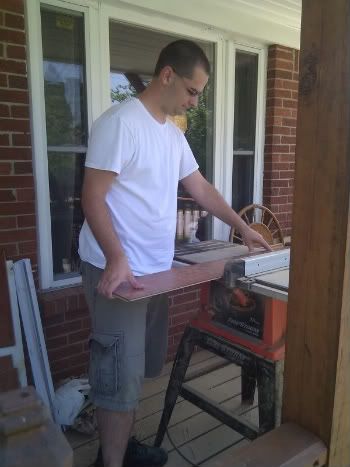
Bryan and the table saw. I really think he enjoyed using the power tools once he got the hang of them!
After 3 days of hard work laying the flooring we finally reached our finished product. What a relief it was to get our living room put back together! We still have 3 bedrooms to do but they will be a piece of cake and after seeing my living room complete I can not wait to get them done!
Enjoy!
This is my cute "before" photo of the carpet. It's our little girl when she was 8 months old gnawing on an unopened can of caffeine free Coke :P


(Don't mind the creepy dog eyes)
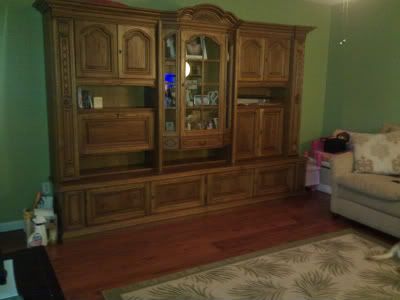
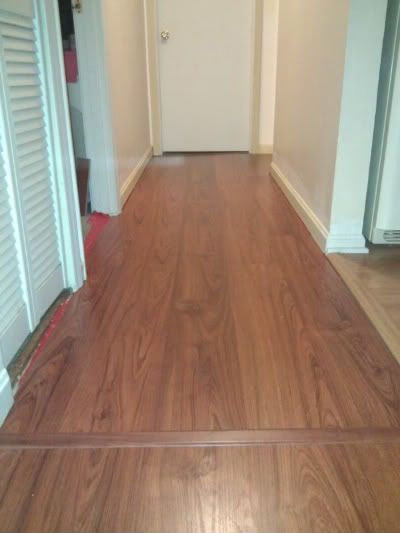
Obviously there is still work to be done; quarter round in many many places is a biggy, painting (don't even get me started on the trim pain down the hallway... previous homeowners could use a knock upside the head for that one), and other little things here and there I can't think of. It wasn't a super easy project but overall it wasn't a complete pain. Once you get started it's not so bad. You really learn as you go, and although it might not be 100 perfect and beautiful, and there might be a few nicks here and there, I think doing it yourself vs paying someone $1-$3+ a square foot to install it for you is well worth the experience if you can shimmy in the time. We both work full time and had a toddler running around half the time!
(Keep in mind during this entire install process the couch had to be left in the room because of its size)
Friday night we started ripping up carpet. It did sound easy at first (for a newbie)... almost fun. That is until you start to see those spike strips all around the edge of the wall, then pull up the padding and see all the staples you have to pluck from the floor. That was probably a 3 or so hour process with 2 people.
So Saturday the real fun began. Laying the underlayment, then just figuring out how to put the flooring down and get started...

As you can see, the guys (hubby and my mom's hubby) started to get the hang of it. You can also see where we only ripped up half the carpet. Once enough flooring was laid they were able to move the couch over and finish the de-carpeting process.

I had to work Saturday so didn't get to see past the first couple rows of laid flooring. Bryan was sure to send me little pic updates a few times which is mostly what you see above. When I got home later that evening this is what I saw:

Over the next two days, Bryan and I were able to complete the living room and hallway all by ourselves. I thought we made a fantastic team! We were cruising along, working through obstacles and minor problems that would come up. I really truly enjoyed our DIY time together.
Here is a vent hole we created. That was really a test of our brain and math skills lol. Thank the Lord for the Saw Zaw!

Bryan and the table saw. I really think he enjoyed using the power tools once he got the hang of them!

After 3 days of hard work laying the flooring we finally reached our finished product. What a relief it was to get our living room put back together! We still have 3 bedrooms to do but they will be a piece of cake and after seeing my living room complete I can not wait to get them done!
Enjoy!
This is my cute "before" photo of the carpet. It's our little girl when she was 8 months old gnawing on an unopened can of caffeine free Coke :P


(Don't mind the creepy dog eyes)


Obviously there is still work to be done; quarter round in many many places is a biggy, painting (don't even get me started on the trim pain down the hallway... previous homeowners could use a knock upside the head for that one), and other little things here and there I can't think of. It wasn't a super easy project but overall it wasn't a complete pain. Once you get started it's not so bad. You really learn as you go, and although it might not be 100 perfect and beautiful, and there might be a few nicks here and there, I think doing it yourself vs paying someone $1-$3+ a square foot to install it for you is well worth the experience if you can shimmy in the time. We both work full time and had a toddler running around half the time!

Hi Lisa! I came here to thank you for your sweet comment on my Special Dates art work post, and I have to thank YOU for this flooring post! We desperately need to replace the flooring in our living room, don't want to pay an arm and a leg to do it and have been trying to find the more cost effective way to do it. Your floor looks great, and I can't wait to show my hubby!
ReplyDeletep.s. Happy Anniversary!