Showing posts with label Maternity. Show all posts

Thursday, October 18, 2012

Welcoming Maddox!

My blog has been oh so neglected here lately, but with good reason! I've been on maternity leave but plan to get back in to the swing of things soon. I can't wait to post about my cloth diapering experience thus far! 

My son's "due date" was September 19th but of course he didn't come that day. I went to work and sulked to myself over how bummed I was... how ready I was to have this baby! I was convinced at that point that he was going to take his sweet time and come 2 weeks late.

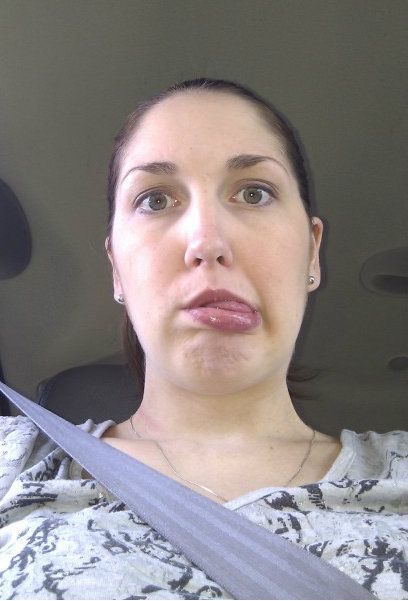
But at 5am September 20th I woke up with contractions that felt different. I wasn't convinced it was labor. Ok, I knew it was labor but I didn't truly think I was having a baby that day... the next day maybe, but not that day as you can see here from later in the day when the family decided to go out for a bit. 

Me being a goofus.
IMG_20120920_131558_zpsc1515715

I guess it was pretty serious. I think that photo was taken around 2pm? Wellll....

On September 20th at 6:47pm we welcomed our precious little boy with all his beautiful dark hair in to the world!

100_6064

Maddox James
7 pounds 7 ounces
19 inches long

100_6071

He was born with very little medical intervention aside from regular hospital procedure (fetal monitor, IV... I did have a spinal block to take the edge off. Thank the Lord for that considering a painful something that happened when pushing!), and boy did he come fast! I got to the hospital at 5cm after laboring at home for around 12 hours, and progressed to 10cm just 2 hours later. I pushed for approximately 45min and there he was crying and, according to my husband, peeing on all the nurses LOL. That's my boy... It took about a week before he initiated my husband and I in to the "We've been peed on by our boy" club :p

Mom & Maddox - 1 day old
Photobucket

Dressed and ready for the trip home!
Photobucket

Hanging on tight to Daddy's finger.
Photobucket

Our big girl, Neha, sniffing the new little creature out :)
Uploaded from the Photobucket Android App

Story time with Daddy before bed.
Uploaded from the Photobucket Android App

Family time at the "pone-kin" patch, as my daughter would say :p
Uploaded from the Photobucket Android App

Maddox with big sister Jaiden!
Uploaded from the Photobucket Android App

My handsome man in his gDiaper. I loovvve cloth diapering!
Photobucket

Family photo including Grampa and Mimi!
100_4844

It has been a truly incredible experience as a mother of 2. My daughter is a huge help and loves her little brother so much! We couldn't possibly thank God enough for all he has provided us with and the way he has provided it. 

I'm excited to see what I can do with a little one around again. Maybe it will bring a whole new dynamic to my blog?! 

Saturday, June 23, 2012

Sewing To-Do List

We are a couple of days in to the 3rd trimester chugging right along! 

IMG_20120622_135935  

July is my busy calendar month and August is my planned prep-for-baby month. While writing it down I realized there's quite a bit to do in the sewing department for Maddox, so I want to make a list not only to help ME out, but maybe to help other mommas out who may be interested in making some baby & momma goodies!

1.) Make a personalized onsie for a Onsie Exchange in my September due date Facebook group!  DONE!!

**Infant Tulle Tutu**

I've been given a few tidbits of information about my randomly picked person so that I can try and create something for her baby that will be special! I'm excited about this. I put this first because I have to have it shipped by August 6th, so I really need to start working on it SOON! Just in case my person happens to read my blog I won't give ideas away yet, but I definitely plan to post the final product once she receives it!

2.) Cloth diaper inserts DONE!


I still have a lot to make. I need to do plain ol' microfiber for my pocket diapers, more fleece/microfiber, possibly Bamboo fleece, and even recently learned that minky is a great material used for inserts. You can check out the inserts I have already made HERE!

3.) Cloth diaper wet bag DONE! (still need to create and link a post)


I guess I could buy one, and I know people have said they use just a gallon baggie but I really wanna take a stab at making my own wet bag. HERE is a link to one by Little Birdie Secrets that has given me some great tips to get started!

4.) Hooded bath towels

I may succeed (or fail) at only making one, or I may enjoy doing it and end up making a whole slew... who knows with me! Every project is so different I just never know if I'll like doing it or not until I do it. HERE is my inspiration from Blissful Sewing. She has a PDF file for specifically a hooded blanket, but if you change up the material, you have a bath towel :)

5.) Baby wipes DONE! (still need to create and link post)

Since we are cloth diapering, why not do cloth wipes? It can't possibly make too much of an impact on the laundry we'll already be doing, and it'll definitely make even less of an impact on the environment.  have found a few tutorials during my research. Many suggest using old knit t-shirts cut up. I totally have a stash of those in my sewing room. Check!! Flannel makes another great wipes material (check out THIS cute tutorial by Sewing Much 2 Luv). I've also seen folks make them with terry cloth.

6.) Moby wrap DONE!

**Moby Wraps & Ring Sling!**

I have wanted one of these since I found the tutorial last year during our 2nd pregnancy. It looks so cool and simple! I just can't bear the thought of paying $45-$60 on the real deal when I can so easily buy the fabric on sale and do it myself, then if I don't like it... oh well, lots of knit fabric for other projects! A Load of Craft has 2 wonderful tutorials (HERE is one of them) plus videos to help you learn how to properly wrap it with baby!

7.) Big Sister/Little Brother shirt and onesie for Jaiden and Maddox

These are so popular on Pinterest and a billion people on Etsy make them, so to be the rebellious and frugal momma I am, I will so make these and make them rock! Ok, I HOPE I will make them and make them rock. I hope.... :p

8.) Car seat blanket cover

Maddox will be here mid September so around that time we can expect the weather to be in its changing period. It's hard to predict around here but either way we'll have a new baby in the warm AND cold months so I want to do what I can to help protect little guy from the elements. Workman Family has THIS tutorial to get me headed in the right direction!

Ooo, on to Mommy things now!!

9.) Delivery gown DONE! (I simply took this Target clearance maternity dress, lopped off the length just above the knee and hemmed the bottom edges... still need to create that link!)

Mr. Maddox will probably be the last baby for us. Lord knows I love being pregnant and wish I could raise a huge family, but my husband and I have agreed that 2 is where we stop (until years down the road when I'm itching to get pregnant again.. I can already see it lol) My daughter was a voluntary induction with a few hours laid up in the hospital bed, then an epidural, about an hour of pushing and voila! It was beautiful, absolutely would not trade it for anything in the world... but this time I would like to experience labor come on naturally, walk around and work my way through it, scream bloody murder because I refused an epidural, and have a baby that I feel nearly killed me in the birthing process. Instead of looking like a hospital patient in the ugly drapes they provide, why not look like a hospital...not-patient-in-ugly-drapes?! Yeaaaah... That being said, I have decided that I would like to make myself a comfortable and cute delivery gown. Now, my luck things will go the exact opposite or happen so quickly I'll never get to wear it, but I still wanna make it :) 

HERE is one idea by Pretty Pushers of what style to make. I have seen different styles sold on Etsy that literally look like a hospital gown but obviously much more cute and customized, wrap skirts, long maxi-like dresses and such. I'm still not 100% sure what style I will do... it depends on what I have in-stock or what I find in-store for cheap that I can alter.

10.) Nursing pads

My hope is to have a successful nursing relationship with my son just as I did with my daughter (although she and I struggled a bit at first). I have a decent stash of the disposable nursing pads, a nursing necessity, in my hall closet I purchased with last year's Flex Spending Account funds. There are probably between 4 and 5 months worth. Mostly Lansinoh, my favorite brand, and I believe a couple boxes of Medela brand which I have never tried. But of course as my trend seems to be around here, I want to see if I can make some reusable cloth nursing pads and make them work! With a little determination and a sewing machine you can search "nursing pads" on Etsy and get fabulous ideas on how to make your own. I'm still doing my research on these... so many fabrics to use and shapes to work with!

I believe that covers it for now. Maybe I have inspired you to try making some of these on your own?! Or maybe I've reminded you of things you'd like to make and subsequently your baby prep to-do list has increased and you want to strangle me... either way! 

~Lisa~

Friday, June 22, 2012

Thrift Store Skirt to Maternity Skirt

Yesterday I did my 10 minute sleeved maternity dress to sleeveless maternity dress.... today I did regular jean skirt to maternity skirt! 

(Please excuse my cell phone photos, they aren't that great. This was a last minute idea and I didn't have my camera handy)

I think it took about 20 minutes or so to make. Nothing incredibly fancy, but nobody will see my handy work outside of this post... and it fits with room to grow, woo! The point was to do it cheap and make it work.

I paid $3 for this Tommy Hilfiger skirt at Goodwill last year.

IMG_20120622_113949

I took the skirt and folded it with the crease in the front and back so that I could get an even cut around the front to put the 'band' which I made using old t-shirts, courtesy my sweet husband!
Uploaded from the Photobucket Android App

Uploaded from the Photobucket Android App

I went ahead and cut out the pockets on the inside since they'd be about useless now. I sewed across the original stitching on the pocket to close them up.

I failed miserably at getting pictures of making the belly band so I'll try and explain it:

I cut a long and wide swatch of t-shirt then folded it in half, laid it over the skirt how I'd want it positioned for the final product (the fold runs along the top in the final product btw) and using a pen I had handy, drew a sloppy line around the contour of the cut I made.

I had to feel my way through the t-shirt material as to wear to draw the line. While still folded I cut the material about 1/2in outside the line I drew. Then I folded the material the opposite way, right sides facing and sewed around the raw edges leaving about 1 1/2inches open at the end so I could flip the material right side out through the hole. That was my quick way of getting clean edges for the band on top of the skirt.

I laid the band on top of the skirt and pinned it on. From there I straight stitched the band on to the skirt!

IMG_20120622_123325

It's quite comfortable! A little bit loose right now but it stays up and as I said earlier, there is room to grow. You can definitely do this with pants also, the suggestion I have would be to try them on and maybe make a little mark with either a pen/marker or even using a straight pin down below your belly where you'd like the lowest point of the band to be. 

$3 skirt to maternity skirts cost me, well $3 :)

Thursday, June 21, 2012

Clearance Maternity Dress Conversion

About 3 years ago I needed to purchase an outfit to wear at Thanksgiving. The cutest thing I could find was a maternity dress at Target. My daughter was a year old at this point so maternity wasn't a very accurate term for me, but it fit and best of all?! I paid like $11 for it!

Thanksgiving044

You can tell it slightly droops in the front to make up for preggo ladies and their cute bellies. I have worn it occasionally since I purchased it but with the long sleeves, even though they are sheer, it made it difficult to wear during the hotter months. The whole dress is a sheer material with a black slip underneath to cover the important parts. 

Today while going through my closet I found it shoved way back in the back and thought how I'd love to wear it now that I'm actually pregnant, but ugh the sleeves! Duh, I own a sewing machine and a pair of scissors so surely I can fix it. I took about 10 minutes of time, cut the sleeves off leaving about 1/2 in of fabric to fold under for a clean edge, then sewed all the way around the arm holes to get a super cute summer sleeveless maternity dress!

My husband was still at work so I had to set up the tripod and get these pictures. I feel as if I have some sort of smirk on my face?? I promise I'm happy though!

100_5687


Then my little girl had to join me... 
100_5688


Have to say I think it looks much much better on the intended consumer (someone who is actually pregnant) AND sleeveless!


~Lisa~

Saturday, May 5, 2012

Matching Maxi Skirts

One of the blogs I have followed for a good while is Elle Apparel. She has so many adorable tutorials for sewing that are mostly really easy if you have the basic sewing stuff down. Last year I ran across her maxi skirt tutorial and swore I'd make one some day. The day finally came!

She made hers because she was pregnant but even if you aren't pregnant you can make one just the same. They are so incredibly comfortable! I decided to make one for myself the other night as a sort of stress reliever. I wore it two days in a row and if I hadn't gotten a little spaghetti sauce on it, I'd probably wear it for a week straight.

My daughter begged me to make her one because she thought mine was just too cute. Mine took approximately 30min and hers took about half that. If you follow the tutorial instructions it's definitely not difficult. I got intimidated by the elastic thread part but with a little practice on scrap fabric it was easy.

I wasn't looking for the beautiful "finished" look so where she used a double needle to hem the bottom I just used one straight stitch. I might eventually go back and run another row of stitching just to make it lays more flat and not risk rolling up but I'm not concerned about it. I'm in it for the comfort!!

My daughter and I:

Photobucket 


Hubby asked me for a belly shot so I reluctantly did one (20weeks and 2 days here). I'm not big on bare belly but I don't suppose it hurts anything. Plus it gives you a little bit of an idea on how I attached the waistband. My raw edges are on the inside of the skirt (just like Leanne did in her tutorial) so I can unfold the waistband as I get bigger, like you can see it did when I lifted my shirt. My daughter's is on the outside of the skirt since her waistband will mostly stay folded down (that's her in the background tearing my tree apart):

 Photobucket


Headband:
 Another cute idea... knit material is so forgiving you can do so much with it. I cut a strip of my material about 1 1/2 inches wide or so and long enough to wrap around my head and allow me to tie it so I could have a matching headband. No need to sew it because if you work it just a bit the raw edges will roll under and it'll look finished!

~Lisa~
Top Mommy Blogs - Mom Blog Directory