

It has been an exciting 4 months here in my cloth-diapering household! I'm proud to say that my son hasn't had a disposable diaper on his bum since he was about 2 weeks old! I've been meaning to come follow-up with how we're doing, what we like and don't like, and especially tell you how my DIY inserts have worked out.
My son has been oh so gracious as to let us experiment with his toosh. We haven't been too rough on him I don't think.
I LOVE LOVE LOVE a fluffy butt!!
I feel fantastic not tossing diapers in the trash can only to be sent to the curb to die (or live rather) in a landfill.
I don't have to run out to the store every or every other week to buy wipes and diapers because I ran out.
We have yet to have a oober poop blowout. I remember disposables with my daughter could barely handle a poop. These things can seriously handle a nightmare!
Here's my booger


Here's my booger and his fluff

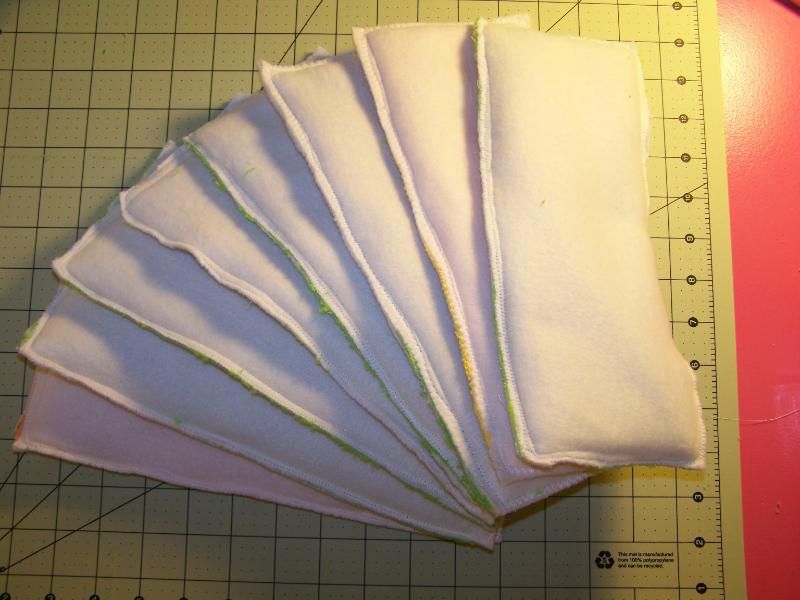
Inserts & Diapers
Part I were the blend inserts with fleece and microfiber.
My goal was to use the blend inserts for my gDiapers. Since this is a follow-up I'll be honest:
They did not work for my son :( I'm not saying they didn't work. They definitely absorbed pee but it was very quickly evident that I had a heavy wetter. They actually did better, in my opinion, than the actual gDiaper brand inserts. Despite them not working in the gDiapers for us they eventually found a place as a doubler in overnight diapers. More on that later...

Part II were the microfiber.

My goal was to use the blend inserts for my gDiapers. Since this is a follow-up I'll be honest:
They did not work for my son :( I'm not saying they didn't work. They definitely absorbed pee but it was very quickly evident that I had a heavy wetter. They actually did better, in my opinion, than the actual gDiaper brand inserts. Despite them not working in the gDiapers for us they eventually found a place as a doubler in overnight diapers. More on that later...
When my son came home from the hospital we began using the tiny gDiapers with disposable inserts. It was far easier than using the cloth. You're changing diapers every hour and unless you're just gung-ho you don't really want to wash inserts every other day. I didn't. It was much easier to wash the gDiaper covers in a regular baby laundry load. Plus the entire gDiaper set was a gift that included two packages of disposable inserts, why not?!
This is one of the only photos I have of him in a tiny gDiaper

You can read more about gDiapers (including the tinies) at Joyful Abode. She helped convince me!
I LOVED the tinies. They were just so adorable, and although I was stuffing them with disposable inserts it felt great using the cloth. The set came with 12 which worked perfectly for the first 2 weeks. He came home weighing just a tad over 7lb and they fit him til he weighed approximately 9lb. At that point we were getting frequent leaks which meant it was time to move up.
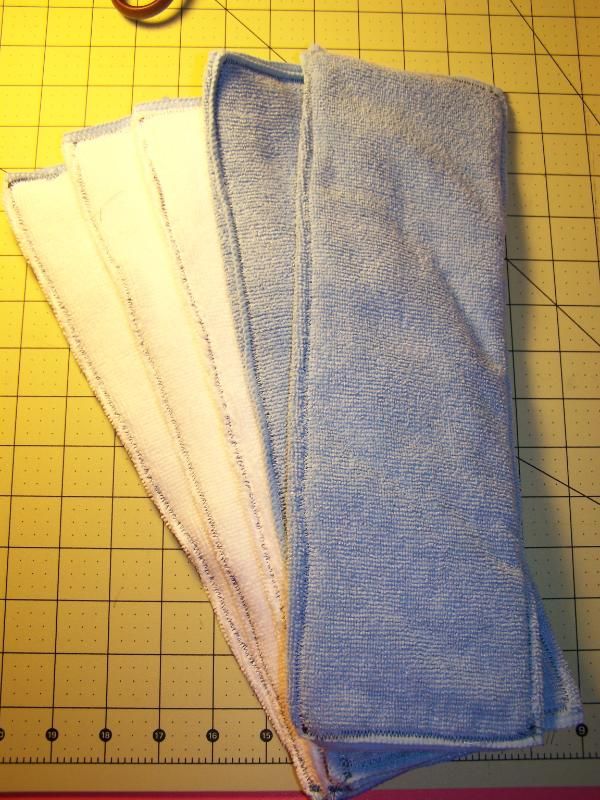
Once he grew out of the tinies we put him in the smalls (we had 8 covers/liners and washed with regular laundry as needed). These were just a little bit too big in the legs at first with using the gCloth, which going back to the above, we learned did not absorb very well for him at all. I started stuffing them with the 5 layer charcoal bamboo inserts which were thick enough and absorbed enough to work beautifully!


The charcoal bamboo are longer than the small gDiaper liner so you see a large bump on the front of his diaper due to folding it over. The inserts not only fit better that way but also provided more absorption where little boys need it most.
The smalls fit him until he was 6 or 7 weeks old. We began to get leaks again so it was time to go for the OS (one size) diapers. In order to get a good fit with the OS I was usually double stuffing with charcoal bamboo & my DIY inserts (blends & microfibers), ESPECIALLY at night. We no longer double stuff daytime diapers.
Just a quick note... in one of my original diaper posts I mentioned I ordered newborn Alva brand snap diapers. These were a no go for us. By the time they fit him in the leg area the leg gusset was too thin and any poop or pee would spill right out. They were an awkward fit for us. so I ended up selling them therefore decreasing my stash by 12 diapers :(
Anyway...
One of my early favorites

Our changing area


The diaper pail is a basic trash can with a lid I bought from Walmart for I think $10-$15? I made a liner out of a shower curtain and sewed a little yellow fabric to it. It worked great for a few months but recently tore along one of my sewn seams. Not anything I recommend unless you just want to take a stab at it and need a cheap liner alternative to hold you over. I won't even make a tutorial for it. I currently use a massove Bububibi brand pail liner.
When possible I try to pre-stuff all the diapers to make it easier to grab and change. Sometimes it's not possible due to working full-time and everything else that's on my plate so we stuff as we go.
When possible I try to pre-stuff all the diapers to make it easier to grab and change. Sometimes it's not possible due to working full-time and everything else that's on my plate so we stuff as we go.
Our general rules of diaper stuffing:
Daytime diapers can be stuffed with the white cotton bamboo (a 5 layer insert; 2 layers of cotton and 3 layers of microfiber) but preferably CBI (charcoal bamboo) and night time diapers must be stuffed with CBI and either MF (microfiber) or a DIY blend.
Daytime diapers can be stuffed with the white cotton bamboo (a 5 layer insert; 2 layers of cotton and 3 layers of microfiber) but preferably CBI (charcoal bamboo) and night time diapers must be stuffed with CBI and either MF (microfiber) or a DIY blend.
Cloth Wipes
I used to use disposable wipes in my bedroom for nighttime changes. Now that he sleeps through the night with the same diaper (not that he actually sttn... just keeps the same diaper on lol) I only use disposable wipes in the diaper bag.

For regular household use wipes I went the free route and stripped several of my husband's old shirts he gained over the years from working at Blockbuster in a load of original Dawn dish soap. I then cut about 3 shirts in to 60 or so small wipes about 6x6-7x7inches. My wipe solution is water with California Baby brand wash mixed in, (about 1 tbsp in the size bottle you see) and a couple drops of Tea Tree essential oil. Give it a generous shake before spraying, apply it to your wipes and wipe away!
The most amazing aspect of the entire cloth diapering process is... my husband doesn't complain a bit about it! He was very concerned about my plans when I was pregnant but I believe he knows that I had made up my mind and gave in. Giving in turned to "if it saves us money, let's do it" and saving money turned in to his incredible flexibility with everything I do. He gives me feedback on what diapers work or don't work. He even occasionally helps me with laundry.... that's a touchy subject. The washing routine is something I'm insanely particular about so the most I usually let him do is run an extra rinse cycle and toss them in the dryer if I didn't have time. My next cloth diaper post will revolve around washing routine. I hope to share step-by-step photos and resources for you to help get the routine that will work best for you.
If you have any questions about anything discussed here please feel free to contact me or visit my Facebook page. As with almost everything I do, it's a learning process so my methods may change down the road but I'd love to help in any way I can if you need it.
Stay tuned for my washing routine and cloth diaper investment posts!
~Lisa~


