Check out Part II for making regular microfiber inserts!
DIY Cloth DIaper Inserts - Part II (Microfriber!)
UPDATE: See Cloth Diaper Follow-Up for a recent review!
I have to forewarn you that I do not have a baby to try them out on (yet)
DIY Cloth DIaper Inserts - Part II (Microfriber!)
UPDATE: See Cloth Diaper Follow-Up for a recent review!
I have to forewarn you that I do not have a baby to try them out on (yet)
These inserts should work just fine for any pocket diaper also. You will need to adjust the size accordingly.
I have done a descent amount of recearch lately trying to figure out what will make good CD inserts for my gDiapers. Most of what I'm reading advises to use a polyester (or more pricey bamboo) fleece outer layer with a microfiber or hemp inner layer. Really any fabric that has a good absorbency is what you're looking for in an inner. The outer layer is to help wick away moisture from baby's sweet tush so that's where polyester fleece comes in handy. I have also heard of people using flannel as the outer layer. If you hunt around on websites that sell inserts just pay attention to what they say they are made out of. If it works well enough for them to sell, it should work well enough for you to make!
What you need:
Outer Layer:
~ Polyester fleece - I purchased 2yds (cream color) since it was on sale, ab $12
OR ~ Suede cloth - This will also work as an outer layer. It's very soft! Some people simply make little suede cloth 'socks' to slide the microfiber in and out of.
OR ~ Flannel - I did purchase flannel later down the road to test out as you will see. I paid $7 and change for 2 1/4yds. I have read some sites sell flannel inserts (6-8 layers of only flannel) I guess as "extras" to stack on top of other inserts for naps or when baby may not get a changed diaper for a while.
Inner Layer:
~ Microfiber - I purchased a 15pk of towels from Walmart for $10. They are thicker than some of the other ones they had. If you cut it right, you can get 4 (small size) pieces per towel.
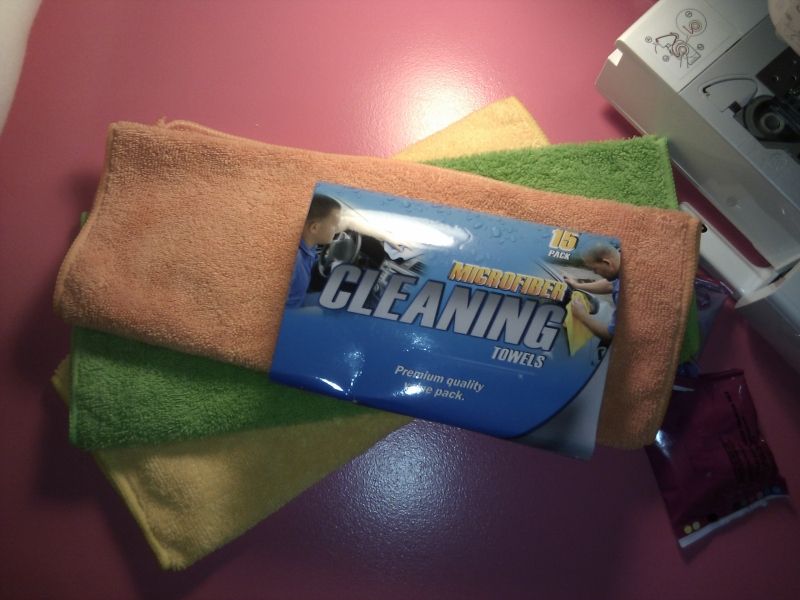
Heads up: Microfiber makes a huge mess when you cut it especially with these thicker towels.. you'll have little fiber pieces floating around everywhere! The rotary cutter comes in super handy here with helping to contain the mess.
~ Sewing machine and/or Serger
~ Scissors or rotary mat
~ Straight pins - I use the kind with the little glass heads on them.
~ Pattern or measurements - I used the size small gDiaper cloth inserts (before they were washed) to get a good measurement.
I did not pre-wash any of my material. It's not necessary. I preferred to wash my inserts once they were all put together. I felt like the fleece would stretch unnecessarily if I pre-washed it.
gDiaper insert measurements:
The measurement for a small size is about 4 1/2 - 5inches X 11 1/2 inches. I didn't write it down so I'm measuring the one I made... next time I'll write these things down!
According to my friend who has a baby in size Medium diapers her inserts measure 5 1/2 X 13 inches. These are the same size inserts for the Large/Extra Large gDiapers.
Start Cutting:
In my first insert I cut out the microfiber about 1/4 to a 1/2in smaller all the way around than the measurements. I wanted the inserts to be tucked inside the fleece. So the fleece got cut to the above measurements for the small size. This is no exact science so don't fret about your measurements.
Layering:
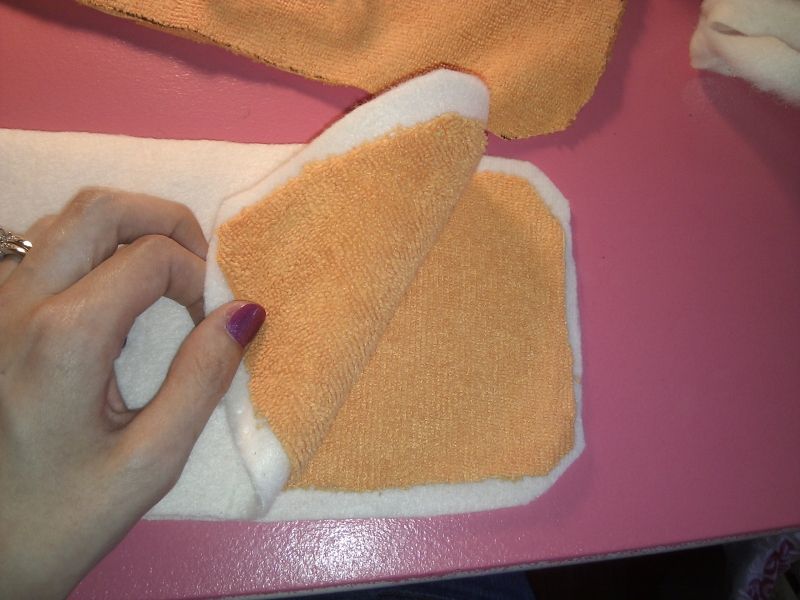
I laid 2 layers of microfiber inside the two layers of fleece and pinned them together. Watch your fleece closely. You can tell by looking at it which side is the wrong side (you can see the lines where the fibers are worked together). You'll want that facing the microfiber so the "right" side of the fleece is facing baby's tush.
Stitching:
About 1/4 inch in from the edge of the fleece do a straight stitch all the way around (you can see that in the finished product below... and I did way more than 1/4 on my first insert lol). Make sure you are straight stitching through ALL layers and not just the fleece.
Once you have it straight stitched all the way around, trim up the outer edges to even them out (I did not do this on my first insert).
Now you will want to do a zig zag stitch (or if you have a serger, serge!) all the way around the outside edges. Try your best to make sure the outside of the zig zag goes off the fabric so it seals up the edges, just like a serger does. Do this around the entire insert.
Again, not an exact science and if you're like me and can't sew straight to save your life, don't worry. It'll work either way but the closer to the edge the better.
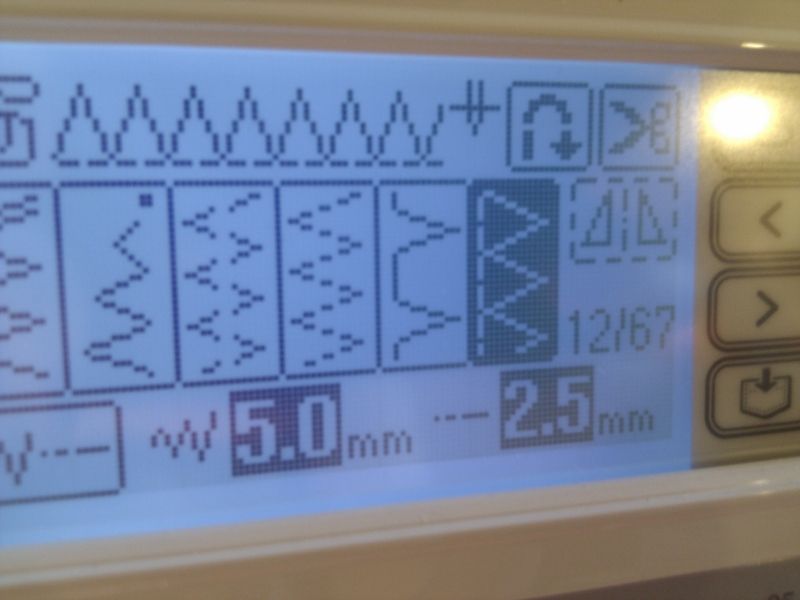
I used this particular zig zag that does a little bit of straight stitch also (the highlighted one on the far right). I figured it would be a better hold. Later on I ended up going with the regular zig-zag, it's the far left stitch on my machine that is partially cut off. Regular zig zag moves a lot faster and is a tighter stitch.
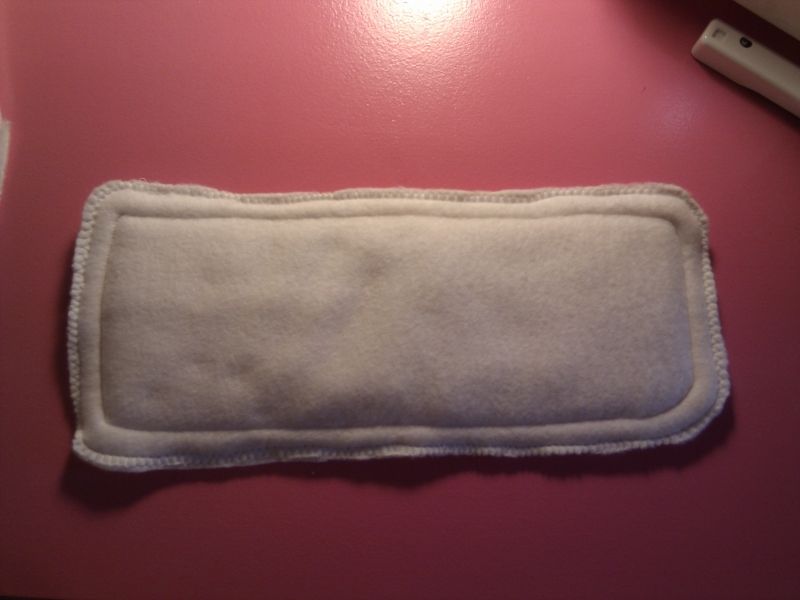
Here is the finished product of my second ever handmade insert. This was done with regular scissors and rounded edges. It is also not washed yet as you see it here.
I made two inserts initially. One of them I did not do the straight stitch around, just the zig zag, so it looks kind of sloppy IMO especially after having been washed. It'll work but luckily I feel I have improved my technique a lot now that I have made about 15 of them.
More Photos & Info:
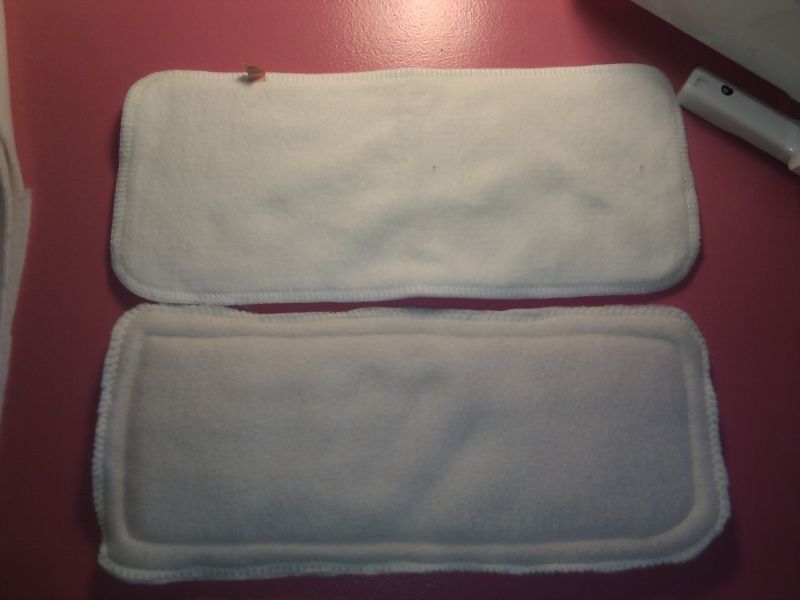
My insert (bottom) VS gDiaper insert (top)
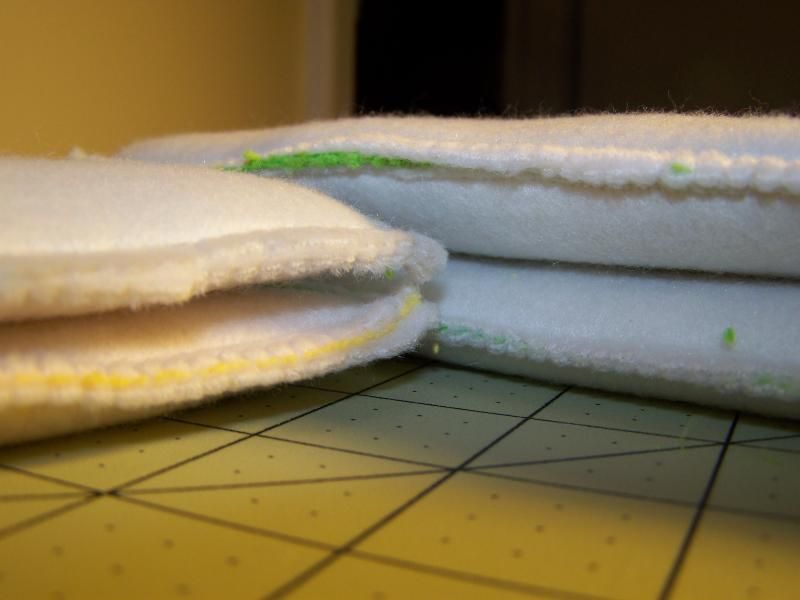
You can't tell here but they are pretty much the same thickness.
You can't tell here but they are pretty much the same thickness.
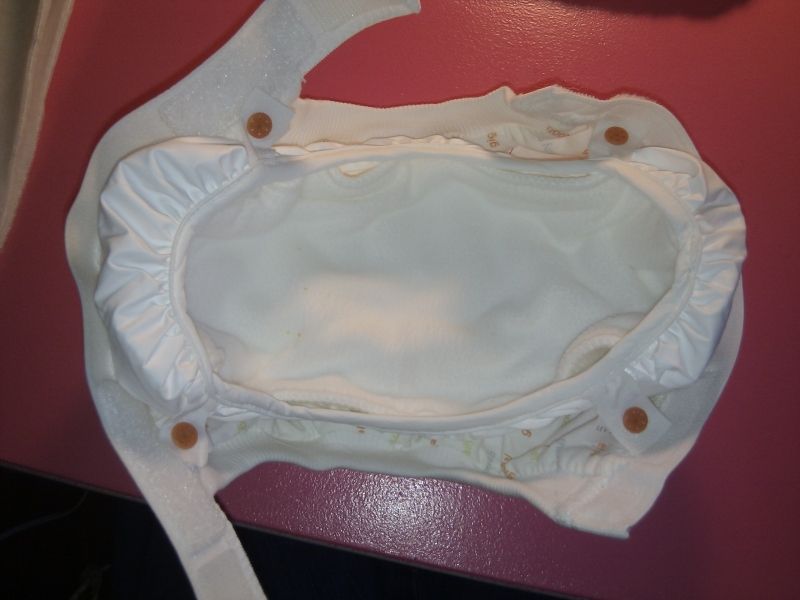
Left: gDiaper insert in small gDiaper
VS
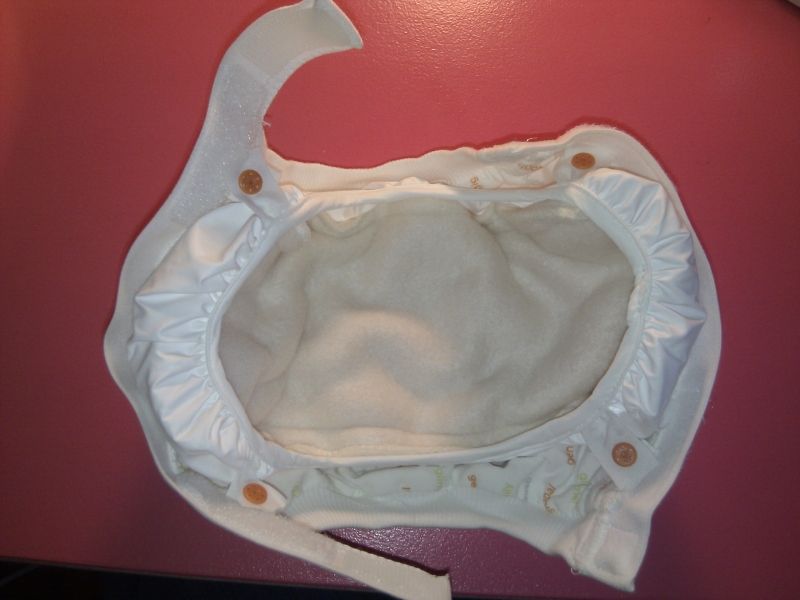
Right: My insert in small gDiaper
Perfect fit!
VS
Right: My insert in small gDiaper
Perfect fit!
Changing it up, more layers and different fabrics:
I have since made a few inserts with 3 layers of microfiber with fleece outer layers to help with extra absorbency and some with 2 layers microfiber sandwiched between 2 layers of flannel on top and bottom (4 total flannel layers).
With this batch I finally went out and bought a rotary mat and cutter. Ooooh how did I go so long without one?! I was intimidated by the Olfa brand that is so incredibly expensive at craft stores but Walmart actually sells a self-healing mat for about $14 and a cutter for about $13. I don't *like* to spend money like that but I really know this will come in so incredibly handy, and already has!
I basically made this last bunch with all the material the same size so you will see the microfiber peaking out the sides. I highly doubt that will be an issue. Some of it will probably even wash off if it's loose fibers.
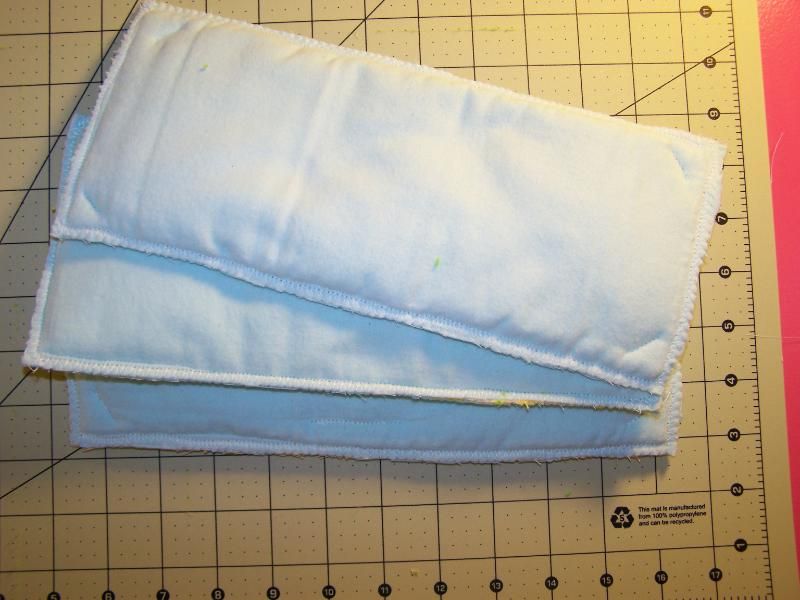
Left: 2 microfiber layers btw fleece
Right: 3 microfiber layers btw fleece
Right: 3 microfiber layers btw fleece
Flannel (2 top and 2 bottom layers) with 2 microfiber layers in the middle.
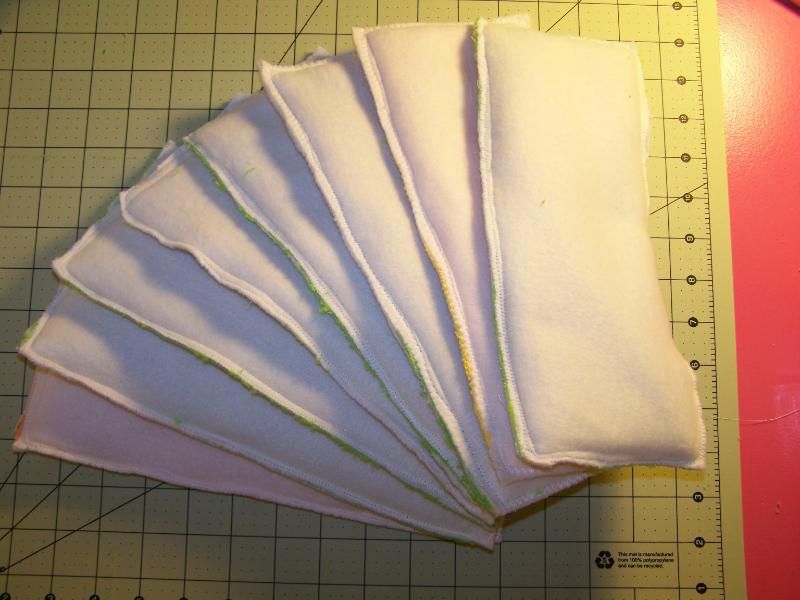
Some of my (small size) fleece/microfiber inserts.
Approximate Cost:
I have yet to use all of the microfiber (have about 4 towels left) and have also not used all of my fleece or flannel (maybe a bit more than half the fleece left and 3/4 if not more of the flannel left). My estimate so far is that these inserts are costing me about $.50 cents to make. Once I've used all the fabric I'll have a better idea of the cost per unit!
Washing & Prep:
I went by the gDiaper insert instructions on prepping my inserts, but also took advice from other brands. Initial washing and prep is pretty easy, just time consuming. They recommend to wash the inserts approximately 3 times before first use in HOT water with NO detergent and NO fabric softeners.
***I am editing this slightly because as I do more research I'm hearing that polyester fleece and/or microfiber does not have to be prep washed multiple times, that just once in hot water will do. I believe the additional washes come with fabrics like the bamboo or hemp (which is probably why gDiaper inserts are recommended to be washed multiple times).
***I am editing this slightly because as I do more research I'm hearing that polyester fleece and/or microfiber does not have to be prep washed multiple times, that just once in hot water will do. I believe the additional washes come with fabrics like the bamboo or hemp (which is probably why gDiaper inserts are recommended to be washed multiple times).
Tumble dry LOW with NO fabric sheets (I had to take my Downy dryer bar out).
They should be good to go after that!
Soon I hope to give everyone a good review of how well they work compared to the regular gDiaper inserts, but based on everything I have read and the few tutorials I have come across nobody seems to be complaining that they don't work!
~Lisa~





This is great! I can't wait to try to make some of these. A friend of mine is excepting in the next couple of weeks, and she asked me to make her some. I'll let you know how they turn out :)
ReplyDeleteI used them in my gDiapers abut we've learned my son is a very heavy wetter, so even with the regular gDiaper inserts he would leak and fill them up fast. Now that my son fits his one size pocket diapers I use these as additional stuffing for night time along with the Charcoal Bamboo inserts and they work great! If your baby isn't a heavy wetter though I'm sure these will do just fine in gDiapers. My friend used some made with terry cloth instead of a microfiber inner layer and they worked beautifully with her daughter.
ReplyDeleteNice post!! Very informative & useful!! I will definitely be following your advice!!
ReplyDeleteHey! Thank you so much for this post! (found you through the wonderful Pinterest!) :P I just have a couple questions. After using these for a while, what did you find you liked more? Were the thicker ones with 3 layers of microfiber better, or did 2 layers work just fine? Also, is there any kind of special detergent or washing instructions for cleaning the dirty liners? I normally use a homemade laundry soap that has Fels Naptha, Borax, and Washing Soda in it.
ReplyDeleteI apologize for the delay in responding!! My son is a heavy wetter so the more absorption I could get the better. I actually had to double my inserts up so I would use one of these (whichever was handy) PLUS a Charcoal Bamboo Insert which has 3 layers of microfiber surrounded by charcoal bamboo. Personally I would make inserts with 3 layers of microfiber if I could go back and do it again just because of that, plus you never know how much your baby will pee! I use ALL Free and Clear with my diaper laundry however, according to The Cloth Diaper Compendium, a new group I found on FB that I HIGHLY recommend joining with everything cloth diaper trouble-shooting related, you can use any detergent as long as it does not have softeners in it... however I do believe the homemade stuff (like the Duggar recipe I have made) is not recommended. You will just need to find whatever works for you, some people have good and bad luck with different detergents. It mostly comes down to what type of water you have and how much detergent you're using!
DeleteThank you so much for this tutorial! I'm trying cloth diapers for the first time (baby #3 is due in a couple weeks), and I was able to make some inserts with an old fleece blanket and microfiber inserts that I had on hand. I love being able to build up my stash for practically no money at all. Thanks again!
ReplyDeleteYou're welcome! I hope you have a great experience with them. I truly enjoyed making a nice stash before baby came along. Even though my heavy wetter needed extra inserts in his diapers, these truly came in very handy and even still do almost 2 years later!
Deletei made these exact inserts for my gdiapers - anyone find that the wet has trouble getting through the fleece layer to the microfiber thus they don't actually absorb much at all??
ReplyDeleteI did the "cup" test ie: took one of my hemp prefolds, a gcloth and my new microfiber/fleece insert and put them each in a separate bowl. I poured one cup of water over each..
prefold absorbed it immediately
gcloth absorbed it immediately (but not all of it)
fleece/microfiber floated on top of the cup of water... and didn't absorb until I squeezed the fabric and released it under water...
I'm so sad I've made a ton of these and I don't know how to fix them... perhaps remove the bottom layer of fleece?? so they are more like a gcloth with only fleece on top??
any help would be so fabulous!
Much of the absorption is going to come with pressure. The pressure of baby's bottom against the inserts will create better absorption that just laying it under water. If I'm not mistaken it's referred to as adding compression in order to truly test how well it absorbs. (you may sometimes hear people say they have compression leaks.. basically insert is too full when baby puts compression on the inserts/diaper and it leaks). Laying it in water will not create a very quick and complete level of absorbing like adding compression will. I'm so sorry you made so many and don't feel they work best for you.
DeleteThe fleece was added to these because of the softness of course since my intention was to use them in gdiapers where the inserts would be on the skin. A good friend of mine made hers with a couple of layers of cotton fabric on the bottom and terrycloth as the absorbing fabric. I believe she also used fleece and she had no issues but her little girl was not a heavy wetter. I resorted to needing heavier inserts in my diapers/gdiapers in order to make it work for him.
You can check out my cloth diaper follow-up page (linked at the top of this post) for a brief review of how they worked/didn't work based on my son's super massive amounts of pee! Hope you find what works for you!
I was just reading about this very problem last night on some website or other, I'm sorry I can't remember which one, but a lot of the time the issue is the use of fleece or poly fleece rather than micro fleece. Micro fleece had super absorbent properties, whereas regular fleece/poly fleece will actually repel fluids. I was looking into making soakers myself, as Baby 2 is due in a little over a month and the few attempts I had made at cloth diapers with Baby 1 had not turned out well. I think part of my failure was that I used the cheaper poly fleece from Joann's rather than the micro fleece. We were also making our own laundry soap at the time and I just learned (again yesterday), that apparently that doesn't work well. Here's to trying again!
DeleteWitch material do you think worked best, flannel, fleece, or the suede?
ReplyDeleteI think I preferred the flannel ones I made.. Wish I had made more but I was afraid because I didn't know anybody who had made any with flannel.
DeleteThis is a great collection. I cant wait to try it out on our first baby due in March
ReplyDelete