
We're less than 2 weeks away from the beginning of kindergarten, and since I am homeschooling I've had to come up with some of my own ideas on how to cut costs and still maintain a functioning home + school environment. One dilemma has been a large writing surface (i.e. dry erase or chalk board).
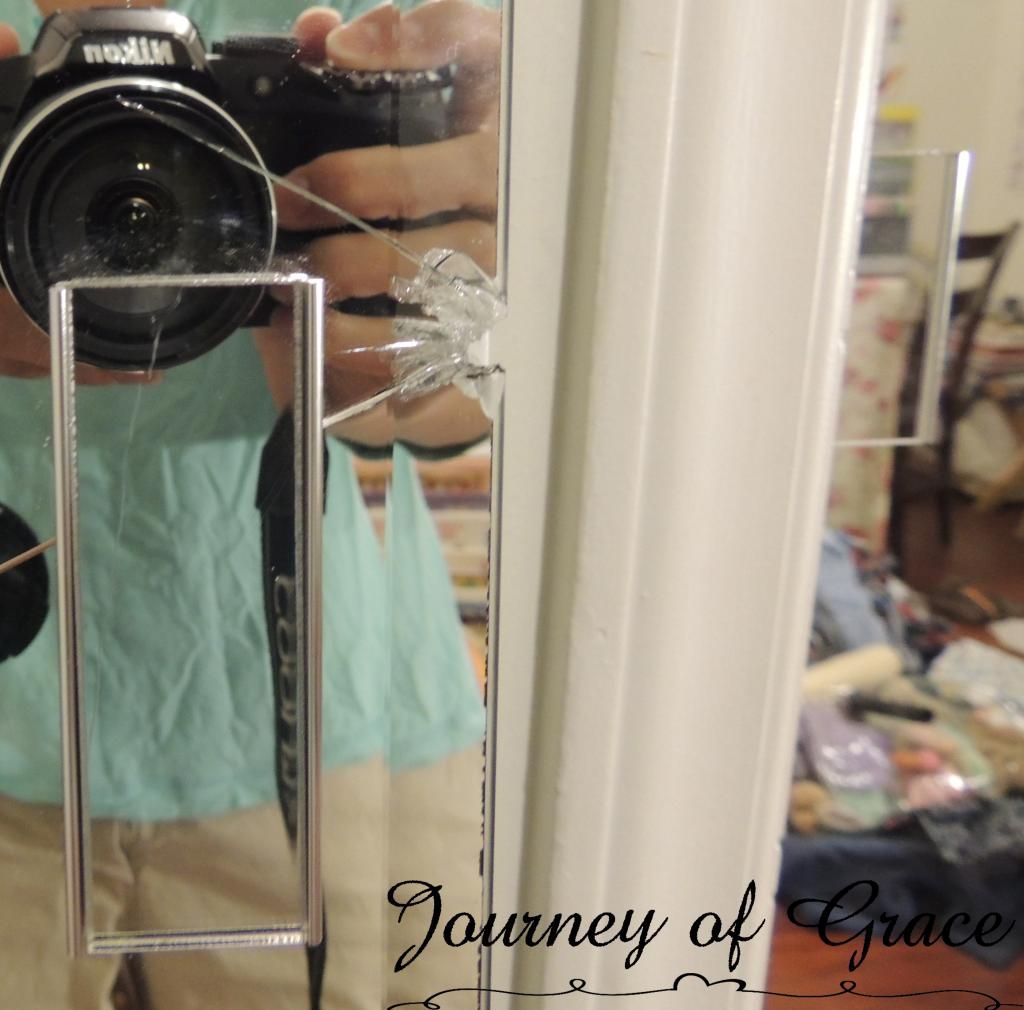
After a little digging I picked the sliding mirror closet doors in my daughter's room as the victim. Normally I would hate to cover them... she loves to use them when she plays, but unfortunately one of the doors has a large crack and jagged edge that I've been itching to hide somehow. And available wall space is an issue so this was a win win!


Here is what you will need:
Glass cleaner
Microfiber cloth
(or something that will pick up all the lint!)
**Primer**
(I used a grey primer. If you don't prime you risk an uneven coat of paint resulting in more paint being used and possibly peeling prematurely.)
Chalkboard paint
(Valspar brand is what I used)
Foam roller
(Don't use one with fibers... I'll show you why later)
Painter's tape & drop cloth
Chalk & eraser
Chalk & eraser
Tape your surface anywhere you do not want paint. Clean your mirror very well and use a microfiber cloth to help grab up any extra linty pieces. Use a foam roller and begin priming your surface. Completely and evenly coat it and let dry. I let mine dry overnight.

**I used a reguar cheap roller for my primer coat. I wish I had not done that. It resulted in fibers being pulled from the roller and left on the mirror. I didn't really catch it until it was too late and far too bad to pick out individual pieces. Once I added a coat of chalkboard paint I took a very fine grit sand paper and sanded down the rough fibers as much as I could.**
Here you can see the fibers sticking out after a coat of chalkboard paint was applied.

You can see in this image where all the fibers caught the chalk later during the "priming" process. It's not a perfectly flat surface but it still writes very well, just a few little bumps here and there.

To fix the nasty chip in the mirror I took a quick and simple route of using painter's tape. I took a couple of small pieces and wrapped it around the chip then proceeded to paint over it. You can barely tell on the finished product.

Apply 2 to 3 coats of chalkboard paint according to package instructions, prime the surface with chalk as shown above (I used sidewalk chalk for quick application), erase and you now have a great writing surface!!
~~~~~
The more I think about it the more excited I am to use the board for school. I can see the sliding doors coming in very handy for hiding subjects, revealing one letter, number or word at a time during different learning activities... yay!


