Thursday, October 18, 2012

Welcoming Maddox!

My blog has been oh so neglected here lately, but with good reason! I've been on maternity leave but plan to get back in to the swing of things soon. I can't wait to post about my cloth diapering experience thus far! 

My son's "due date" was September 19th but of course he didn't come that day. I went to work and sulked to myself over how bummed I was... how ready I was to have this baby! I was convinced at that point that he was going to take his sweet time and come 2 weeks late.

But at 5am September 20th I woke up with contractions that felt different. I wasn't convinced it was labor. Ok, I knew it was labor but I didn't truly think I was having a baby that day... the next day maybe, but not that day as you can see here from later in the day when the family decided to go out for a bit. 

Me being a goofus.
IMG_20120920_131558_zpsc1515715

I guess it was pretty serious. I think that photo was taken around 2pm? Wellll....

On September 20th at 6:47pm we welcomed our precious little boy with all his beautiful dark hair in to the world!

100_6064

Maddox James
7 pounds 7 ounces
19 inches long

100_6071

He was born with very little medical intervention aside from regular hospital procedure (fetal monitor, IV... I did have a spinal block to take the edge off. Thank the Lord for that considering a painful something that happened when pushing!), and boy did he come fast! I got to the hospital at 5cm after laboring at home for around 12 hours, and progressed to 10cm just 2 hours later. I pushed for approximately 45min and there he was crying and, according to my husband, peeing on all the nurses LOL. That's my boy... It took about a week before he initiated my husband and I in to the "We've been peed on by our boy" club :p

Mom & Maddox - 1 day old
Photobucket

Dressed and ready for the trip home!
Photobucket

Hanging on tight to Daddy's finger.
Photobucket

Our big girl, Neha, sniffing the new little creature out :)
Uploaded from the Photobucket Android App

Story time with Daddy before bed.
Uploaded from the Photobucket Android App

Family time at the "pone-kin" patch, as my daughter would say :p
Uploaded from the Photobucket Android App

Maddox with big sister Jaiden!
Uploaded from the Photobucket Android App

My handsome man in his gDiaper. I loovvve cloth diapering!
Photobucket

Family photo including Grampa and Mimi!
100_4844

It has been a truly incredible experience as a mother of 2. My daughter is a huge help and loves her little brother so much! We couldn't possibly thank God enough for all he has provided us with and the way he has provided it. 

I'm excited to see what I can do with a little one around again. Maybe it will bring a whole new dynamic to my blog?! 

Wednesday, August 22, 2012

Baby Wearing - My 4 infant carriers for under $60!

Maddox's due date is fast approaching... We're down to less than 30 days!

100_5964

I've been busy the last few days making different baby wearing items to use when he comes along. My goal is always to save money. Truthfully I don't NEED any of this but knowing I can have something "designer" for a fraction of the cost by making it myself makes me feel like I NEED it, and I know they will get used so I don't see any waste in it. Now I just need the cute baby to put in them!

Ok, let's get this baby-wearing party started! 
First, meet my tester babies...

Photobucket
  
BabyBjorn

**UPDATE**
I suppose I knew the Baby Bjorn wasn't a great option. Just never really looked in to it much. Now I'm inadvertently more knowledgable on the subject. If you simply do a Google search on the dangers of Baby Bjorn style carriers you'll get the hint really quickly. Use this with discretion if you choose to do so.

Ok, one thing I can't really make is a BabyBjorn carrier, but it falls in to the baby wearing category so I wanted to share my awesome find. Secretly I have wanted one of these since the early beginnings of my pregnancy. There are several different styles and prices starting around $55 if you wish to buy new.

100_5982 

While at a kids consignment store a while back I found one on a rack with their baby carriers. I ignored it because I didn't really think we needed it until DH realized our old Snugli had pink accents. I told him about the black BabyBjorn I had seen so we took off to the store hoping it'd still be there.

Thankfully it was still there and after using $10 left on a gift card we only paid $10 out of pocket for a great-looking BabyBjorn Original!


Moby Wrap

The Moby Wrap is definitely my "thing." Making your own Moby is incredibly easy. The hardest part is dealing with a ton of fabric but it's a minimal sacrifice for the savings!

Price out knit fabric first. I was able to buy mine for $5 a yard on an end of bolt discount table. I bought the whole 7yds that was left. Keep in mind when pricing it out that 5yds of fabric from the bolt will make 2 wraps as long as it's at least 40 inches wide. Unless you are buying some outrageously expensive knit you will probably not exceed the retail price of a Moby and making one will still be totally worth it.

I don't really know what my knit is technically called.. it's a very soft maybe medium weight(?) knit that stretches width-wise. In doing research I'm finding the best support comes in a 2-way stretch in the width rather than a 4-way stretch in both length and width. If it stretches in length the fabric is going to loosen up and give a little more over time and you may find yourself adjusting it.

You don't even need to have sewing skills to make this wrap unless you wish to serge the edges and/or add a fabric panel. Otherwise it can be simply knit.

To make your own you will need:
  • 5 yards of cotton knit fabric cut to about 20-23 inches wide. Mine is about 23" wide. My knit was 60in wide so after cutting out my 23" I have plenty left over for another wrap.
  • **Optional** Square of fabric (in my case 24"x24") to use as a supporting/decorative panel. 
  • **Optional** Serger if you want finished edges. I don't have one. I did a test strip to see if I could zig-zag the edges... I do not recommend that. Knit doesn't flow under the presser foot very well on edges so it tended to get bunched up a lot. 
  • Scissors and/or rotary mat
 Elle Apparel has a good visual of the cutting process which is the way I cut mine.
(She uses a 4-way knit if you follow her tutorial and I have not seen any post regarding issues with support from her. Reading the comments in her post got me in to researching the differences and that's how I came up with the conclusion to use a knit that stretches in the width.)

Photobucket

I really love my white Moby Wrap but life reminds me white will probably not look so white forever. This wrap has a more elegant look to it so it might be one I use for special occasions or to be a color-neutral option depending on what I'm wearing.

Photobucket

In order to have another wrap available for more casual use I knew I needed a different color knit but I was not about to go buy more. Rit Dye to the rescue! Never used this stuff before but in order to get what I wanted for a minimal price, dying the fabric was my only option.
You can check out how I dyed all this fabric here!

Moby Wraps cost $45+ depending on the style you want.

The white wrap cost about $15 after adding the fabric panel.
The brown wrap cost about $16 after adding the fabric panel and dying the knit.

100_5964
100_5980  
(I did the best fit I could considering I have a large belly in the way. What you are seeing is the newborn wrapping method so the panel is folded in half to create a pouch for baby.)
~~~~

Ring Sling

To make your own you will need:
  • Between 2 and 2.5 yards of fabric in length and between 25-30in in width. I'm a small framed person so 2 yards x 30in works for me (Fabric FAQ)
  • Coordinating thread
  • 2 Aluminum sling rings appropriate to the weight of your fabric (I used Large 3in rings from www.slingrings.com). I ordered the 3-ring assorted size samples in neutral colors. It'll come with a set of large, medium, and small rings. I think I was given silver large, black medium, and navy small. 
  • Sewing machine
The fabric I purchased is an embroidered fabric so it looks the same on both sides. This works perfectly because the tail of the fabric, once pulled through the rings, will show the back, or wrong side. If it looks the same on both sides it's not really an issue. If it doesn't, you can always choose a coordinating fabric to with the same dimensions to sew on to your fabric, or leave it as-is. Up to you :)

My fabric (what was left on the bolt) was 2yd4in x 60in. I simply cut down the center fold to get my 2yd4in x 30in fabric. Just like with the DIY Moby, once you've cut down the center you essentially have enough left over for another sling. I, however, used a chuck of that leftover fabric to make an elegant panel for my white Moby.

I hemmed my fabric on 3 sides to hide the raw edges. On the short side that will get tucked through the rings I only folded in once. There will be plenty of thick fabric to sew on that end once the rings get put on so one fold is plenty.. the raw edges will not be seen once it is completed.

Adding the rings:
As illustrated in the "fanned/gathered technique" photo from Variations on ring sling shoulders, mark your fabric at 1/2 in, 2in, then 2in again. This will help you to place your rings in the right spot and show what point to fold your fabric to so you can sew it down. 

Photobucket

To make your sling without pleats you have to be patient, pin a lot, and sew through several layers of bunched up fabric. It wasn't so bad but I noticed when I was done the fan was quite wide compared to a pleated fan. I've read that can be uncomfortable over time with the weight of a baby if the fan of the shoulder goes too far down your arm. Makes for less mobility of your arm.

I went back and bunched up the fabric more, sewing along the same line, then moving up and sewing a new line for added security. I even attempted a decorative stitch on top of that 2nd row of stitching. Attempted. It serves its purpose but didn't turn out so great probably because of the amount of uneven fabric it was working through. Good thing it was white thread and not incredibly visible.

Photobucket

Once you have your rings sewn securely in place for the shoulder (may want to do a decorative stitch or go back over with a couple more straight stitches) you can try it on and "thread" your rings! 

This Ring Sling cost me about $10.

100_5958

~~~~

If I had went out and purchased a brand new BabyBjorn, 2 Moby Wraps, and a Ring Sling I'd be looking at over $200 worth of products. I'm very happy to have a variety of carriers for under $60!


~Lisa~


Rit Fabric Dye

My new favorite invention... Rit fabric dye! How cool is this stuff??!! Uhm, VERY!

I've only used it once so far and I'm thrilled with it. I can't wait to try it on some more projects, woooo!

Here you'll see where I posted about different baby carriers, one of them being the DIY Moby Wrap. I had purchased 7yds of white knit fabric. Some of it was used for a white Moby and I wanted to make another one but needed a different color fabric. I chose to dye the fabric with Dark Brown Rit.

(These are photos of my Moby Wraps, one with the regular white knit and the other with the dyed fabric)
Photobucket

Photobucket

You will need:

- Fabric (preferably a white color. If you are wanting to dye a different color you need to check out a color wheel to determine what color dye to purchase to get the desired outcome. Experimenting with swatches may be necessary)

- Rit Dye of your choice (they sell it in liquid or powder form at craft stores, and places like Walmart or Target in the laundry detergent section)

- Gloves

- A spoon or long stirring item you don't care about

- If you choose to do the stove-top method, a large pot that you will never cook food in. I'm using the sink method so a pot is not really needed (except I did boil some water).

~~~~

I'm working with a ton of fabric in this project: 5yds long by about 30in wide.
  • First, especially if you are working with new fabric, wash it. I'd recommend not using any fabric softener, just regular detergent. You want to wash out the starchiness. If you add fabric softener to your washer or dryer load it will cause repelling (maybe more so over time, but just don't add it at all yet since you really want your fabric to grab the dye).
  • While your fabric is washing get your dying method ready. I used the sink method since our sink is deep, black and won't stain. I brought water to a very early boil (I just wanted water that was slightly hotter than I could get out of the faucet) in a 6qt pot and poured it over in to the plugged sink. To fill the sink up a little more I turned the faucet on hot.
** Now is a good time to glove up and put on some crummy pants along with one of your husband's undershirts because your belly is so big at 36 weeks the only shirts of your own that still fit are too nice ;) **
  • The sink method says to use 1 cup of salt and 1/2 bottle of Rit dye. I added the salt first, stirred it to dissolve then added my 1/2 bottle of dye. Stir it around for a minute so the dye mixes in with the water
Photobucket  
  • Rit recommends you add your wet fabric to the dye slowly and without folds. Oh boy. Luckily I used the washer so I don't have to wet the fabric. I just had to pull it all out and untwist it. I laid my heavy 5 yards of wet fabric on the counter and starting with one end slowly dipped the fabric in to the water making sure it went in with no folds or creases that would prevent dye from touching it evenly.
  • Once it was all in I started the tedious task of stirring around fabric for nearly 30 minutes. Being 36 weeks pregnant I pulled up a stool and set there mixing and moving and re-situating the fabric with my gloved hand. I made sure to pull out pieces every now and then to make sure it was getting dye everywhere in hopes to prevent any blotchiness in the finished product.
Photobucket  
  • After the 30 minutes (it says 30-60min.... 30 sounded just fine to me!) I drained the sink and pressed what excess water I could from the fabric. Rit says to rinse the fabric until the water runs clear. That would take literally centuries in the sink so I tossed my fabric in to a bucket and took it to the washing machine. 
  • I did 2 Delicate loads on warm both with extra rinse cycles, NO detergent. Then I did another load WITH detergent and the extra rinse cycle. This process kind of reminded me of coloring your own hair. They always tell you to rinse until the water runs clear but no matter what the next time you wash your hair the water is never clear. The first two wash cycles did a well enough job in my book even though during the 3rd cycle with detergent I still saw slight discoloration in the water.
You will need to wash your fabric separately or with like colors the next few times you decide it needs to be washed in case there is more bleeding.
Once I was done with the rinsing and washing I tossed the fabric in to the dryer. What a beautiful brown I got! I think it could have come out darker if I had either added the whole bottle of Rit or sat there for another 30min stirring it around, but I'm actually very very happy with the color!

100_5964

~Lisa~

Friday, August 10, 2012

DIY Cloth Diaper Inserts - Part II (Microfiber!)

UPDATE: See Cloth Diaper Follow-Up for a recent review!
In the above link you'll find my very first post about cloth diaper inserts. In general it revolved around gDiapers however they can be used for any diapers as long you make them to fit. This tutorial is specifically for microfiber inserts. It's very simple so don't worry :)

What you will need:

~Dimensions of the inserts for your diaper
In my case, I have mostly Alva brand. Check with your favorite brands for insert dimensions before you get started.  

Alva (regular) - 12.99" x 5.32"
Alva (newborn) - 12.60" x 4.33"

~Microfiber towels 
The ones I used for the newborn inserts are 14x14 (pictured in white or blue)
For the regular size inserts I used towels measuring 14x17 (pictured in yellow)

~Sewing machine or serger

 ~~~~

There truly is no cutting involved in my case here unless you're looking for exact dimensions and rounded corners. All you need to do is tri-fold your microfiber towels evenly, pin (which I really didn't do) and zig-zag stitch all the way around. 

You can see my yellow towels were already creased for me. I folded in thirds along the longest part that way the inserts are 14 inches long and about 5.5 inches wide.
Photobucket Photobucket Photobucket Photobucket

The newborn inserts end up being 14 inches long and about 4.5 inches wide.
Photobucket

Here is an Alva newborn microfiber insert next to my "newborn" microfiber insert. Slightly longer but that's ok. They are the same thickness and it should work just as well.
Photobucket

FYI: 
If you have colorful microfiber towels like I do, be mindful that they may shine their colors through your white or lighter colored diapers. I still need to make many many more regular size inserts but it will be a while til our son fits those so I'm not yet worried about hunting down white towels. 

To prep: Wash once in hot water with detergent (I'm using All Free & Clear as my CD safe detergent for now). Dry on low heat. NO FABRIC SOFTENERS! 

So there you have it! You now have easy microfiber inserts for your pocket diapers. 

Microfiber is not recommended for use against baby's skin. It's not a very pleasant feeling material and many people say it causes rashes and other issues with their babies. If you have diapers where the inserts are not put in a pocket but instead lay against baby's skin, refer to my Part I post about adding fleece or flannel as outer layers.

~Lisa~


Tuesday, July 31, 2012

Pregnancy & Post-Partum Helpful Tips!

Photobucket
With a new baby soon to be entering our lives I've been poking around online at different baby-related things. One thing I have come across a few times are "lists" or "things" to help you prepare for baby. I guess as a blogger I felt the urge to make my own. My list consists of stuff I found helpful with my daughter, things I wish I had done to prepare for her entry in to the world, or things I'm currently doing to help prepare for our son.

Speaking of which, here is a side view (profile) of his wittle face! About 7 more weeks to go :)
IMG_20120730_131443

Before you have your baby

Kegel Exercises:
BabyCenter.com info on Kegel Exercises
"Kegels are exercises you can do to strengthen your pelvic floor muscles – the muscles that support your urethra, bladder, uterus, and rectum. The exercises.... help women with urinary incontinence, or diminished bladder control, which can happen after childbirth."

Perineal Massage:
BabyCenter.com info on Perineal Massage 
"Starting around 34 weeks, try massaging your perineum (the area around your vagina). Daily perineal massage may increase the area's ability to stretch, leading to less need for an episiotomy and fewer natural tears."

Hydrate:
Drink plenty of water. I admit, I'm not so good at this, but you'll notice less swelling and things will "move" through your system a whole lot better! Hydration can also help your skins elasticity and could reduce cellulite and stretch marks. Plus baby wants water, too!

Expect Swelling:
I haven't experienced swelling in my extremities until around 8 months (32 weeks or so). Most likely you will swell before the baby gets here. Be ready to take off your wedding ring and wear it around your neck! With my daughter I gained weight pretty quickly in the last 8 weeks probably due to the swelling. Prop your feet up whenever you sit! The good thing is it will all melt away after delivery :)

Prepare yourself with a list of items to get an RX for and provide it to your OB at one of your visits:
I have not done this particular step yet, but many OTC health items are no longer covered under the IRS with Flex Spending Accounts (FSAs) or tax deductions. For example: I can not buy Tylenol any longer with my Flex card unless I have a doctor's RX for it. You'll find that many of the items you need for baby and for yourself post-delivery fall under that category, so prepare yourself ahead of time! The hospital may provide you with an RX list upon discharge. Ours did, and it included many regular OTC items. That will cover it, but we were surprised by this massive list of needs. My husband had to rush to the store to go buy everything up so I could have it. I'm trying to make sure you buy it BEFORE you need it :)

After the baby shower for our daughter we took a trip to Walmart and bought a few needs. You'll probably get a lot of the little things (shampoo, rash cream, extra diapers) but you may still need to fill in some gaps. We bought band-aids, Neosporine, a thermometer.. things like that.
  •  Purchase necessities for YOU for after delivery:
Little did I know (as stated above), you will actually need some stuff for yourself once baby is delivered. The hospital will provide you with most of it while you're there, but you'll need it for at home as well. Buy it now so your husband doesn't have to!
    • Tucks/Witchazel Pads - Get lots. They'll help tremendously with healing. Whether you get a tear/episiotomy or not, it's going to be sore. I had an episiotomy and these came in super handy for the first couple weeks.
    • Feminine sanitary pads - Big ol' maxi pads! You're going to have bleeding and who knows how heavy or light it will be. Be prepared to change these frequently (especially if you have a tear or cut).
    • Stool Softeners - You don't want to strain any more than you already have. The hospital may start giving these to you along with any other medication you need after delivery. I personally try to take them daily throughout pregnancy since carrying a baby wreaks havoc on your digestive system.
    • Comfy panties - Buy some cute cotton "granny panties" (no laughing at that!) that will be comfortable and hold your pads. I remember preferring a boy short style. Don't get something that will fit you too tightly.
    • Breastfeeding must-haves for mom -You will need certain items on hand to help with breastfeeding after delivery. In the hospital you may only need a couple of these items on hand (a couple bras and some nursing pads) but when you get home there may be more you find you will need! Check out this great source: What breastfeeding supplies do I need?
Research birthing options (hospitals, birthing centers, home births):
Talk to your doctor/midwife about your specific options (may vary according to your health risks/needs). Be sure to take a tour of the location.

Research Breastfeeding:
I'm a big advocate for breastfeeding. Doesn't mean I disagree with formula-feeding moms, but often-times breastfeeding is given up on so quickly due to lack of education and proper resources to assist you through the problems. Don't give up so easily. I had a horrible time initially with my daughter because I just flat out knew nothing, only that I wanted to breastfeed! Eventually I learned she had reflux which could have saved me a lot of heartache early on if I had know the signs/symptoms and how to handle it!

Research Cloth diapering , homemade baby wipes, and other environmentally safe or natural options:

Photobucket

I did not cloth diaper my daughter. Instead we preferred Luvs & Pampers (hooray for coupons!), but this time around I did a lot of research and wanted to take the plunge. I'm loving it so far and I haven't even had the baby yet to stick them in!

Research postnatal procedures for your baby such as circumcision, vaccinations, testing etc:
As Mom/Dad you need to make the choices for your baby you believe are the best, so educate yourself now!

Take any classes you’d like that are offered by your local hospital or Mommy stores: 
Our local hospital offers several different class options ranging from breastfeeding, first aid, birthing techniques and classes for older siblings. We also have a "natural" Mommy store in town that offers classes (Lamaze, Cloth Diapering 101, Breastfeeding Essentials). The hospitals and stores both may charge for these classes. In my opinion the classes offered by the stores may be the best with better in-depth info although probably more expensive. Insurance may cover Lamaze classes.

Consider your birthing options and research the benefits/drawbacks of everything:
Epidural? Pain medication? Laboring at home before going to the hospital? There's a lot to think of. See the next point below for a list to get you thinking about it!

Create your own birth plan:
I used Earth Mama Angel Baby's birth plan form.
You can find tons of websites online that offer "birth plan" print-outs. I highly suggest you take advantage of this, if not for anybody but yourself and your spouse! I asked my OB if they wanted a copy but advised me it is nothing they would keep in my file. She said it's up to me at the time of labor & delivery to ask for/refuse certain options. I have printed out my birth plan anyway to have on hand when we get there. My husband can refer to it if need-be. Things may change and certain procedures may become necessary but my hope is to ward off anything unnecessary.

Organize your nursery:
 We started the nursery organization early due to minor home projects and room switches. We have the basic bit down but truthfully until you have a baby shower or have purchased everything this may be one of the last steps you take in preparation for baby. If you're cloth diapering look up different organizational tips from others who CD. Have the creams, ointments, wipes etc handy. Organize clothes in your closet/drawers by size. Get bottles and other items washed and ready if needed. Open and test your breast pump to make sure it works properly. Clean all of the accessories that come with so it will be ready for use if you need it soon after arriving home.

Wash baby clothes/linens:
Pick your preferred detergent for baby clothes and be sure everything (or at least everything you will need in the early months) is washed and ready. Do not use fabric softeners as these can compromise items that are meant to be fire retardant. Fabric softeners can also reduce absorption. If you have a baby with reflux you definitely don't want your burp rags to not absorb!

Here are some options:
  • Homemade laundry detergent (which is all we use now however not recommended for cloth diapers)
  • Dreft
  • All Free & Clear (safe for cloth diapering)
  • Seventh Generation
  • Soap Nuts (safe for cloth diapering)
  • Most anything without dyes or fragrances. At some point we did move on to washing baby clothes with our clothes, but in the first several months I feel it is safest to wash in a "baby friendly" detergent.
Plan meals ahead for after baby’s birth:
Take a few days in the weeks/month or two before your due date and prep or cook meals that you can freeze.You may have family or friends bring you meals but you'll want to be prepared for anything! There are so many sources online for plan-ahead meals I can't even begin to link just one. Pinterest is your friend here!

Consider newborn photos and schedule them now!
I have heard the best time for newborn photos is within the first couple of weeks. You have a baby that is easier to maneuver and slightly less active than one that has begun to discover their movements. Go ahead and set up an appointment or maybe a tentative date with someone, then be sure to notify them once you have the baby... or whatever it is you decide with the photographer.

Pack your hospital bag:
Here is a well-rounded list from BabyCenter.com
Undoubtedly the hospital bag will be your best friend. And you never know when you'll need it, so have it ready! I suggest that you have it packed or in an accessible place with everything you can by week 33/34. You may still be using some of the things you need up until the last minute (like hopefully your tooth brush) so consider buying travel-size goodies or extras, or make a check list and be familiar with where everything is so your husband can do a quick grab-n-go as you're contracting out the door!

Have your car seat installed:
Around the time you get your hospital bag together, install the carseat base in your vehicle(s). I personally recommend you do NOT keep the seat in the vehicle until you need it. In the event the vehicle is involved in an accident you are then supposed to replace the entire system. I'd rather replace a $30 base than an $80+ car seat.

Check the NHTSA website for a list of local Car Seat Inspection Stations. Typically your local police department and sometimes fire departments have people certified to do them. At this point my husband and I are comfortable installing them ourselves, but initially with our first kiddo, we opted to have them installed by an officer. They gave all kinds of helpful tidbits at the time.

Work out a “delivery” plan for older children: 
Will they be with you? Do you have a baby sitter on-call? I'm not sure yet exactly what I'd like to do but this isn't something I necessarily want to take as it comes. I'd like to be slightly prepared just in case, but ultimately plans with labor can fall through very quickly so we're trying to not over think it. Even just a list of 3-4 willing helpers (you never know who is doing what & when so have more than 1 option!) with phone numbers to go through whenever you need them should suffice I hope.

Cleaning:
Just an idea... Have your spouse, significant other, or another family member/friend come over and help you clean the house thoroughly a couple weeks or so before your due date. Don’t overdo yourself even in the nesting phase, but the more you can get done now the less you have to worry about after! If you have children already you may understand how keeping a house clean at times can be hard. I have yet to experience it in the final days of pregnancy with baby #2, but I can only imagine how difficult it will be! Maybe even see if someone can go by your house while you’re at the hospital and do a little cleaning ;)

After Delivery & when you get home

Nurse your baby as soon as possible:
Breastfeeding your Newborn
Even though your milk has yet to come in, allow your baby to nurse as soon as possible after delivery. I think after about 30 minutes or so is when I first tried. Things had finally settled down in the room for us. The nurse offered some fantastic initial help with latch and a little advice to get me through until a Lactation Consultant was able to visit the next day.

Consider keeping your baby in the room with you:
I opted to have my daughter with me in our room. It wasn't something I ever really thought about but I couldn't bear the idea of not having her near me once she finally arrived! We were able to feed on-demand, and I didn't have to wait for a nurse to bring her to me or go get her myself. Take a break if you'd like and don't be afraid to have the nursery watch her for a while, but I believe you'll truly enjoy having your baby with you.

Take care of yourself:
Looking back I felt incredibly lazy after I delivered my daughter. I took a shower but just laid up in the bed the entire time. I stayed an extra day in the hospital due to her being jaundice. I wish I had pampered myself a little, did my make-up, changed in to something other than a hospital gown, got up and moved around... This time I hope to actually have the will and motivation to do more for myself. You're going to be flat out exhausted but sometimes if you do a little for yourself it'll brighten your day!
 
Have your meals & snacks easily accessible for when you’re home alone with your baby:
My husband had to go back to work just a couple of days after I got home with our daughter. As a manager he couldn't really leave work whenever I needed him so much of my day was spent alone with baby. There were few visitors and family wasn't very close. It was very frustrating at times that I had not prepared ahead of time to have meals and goodies right there where I needed them most. With a significant episiotomy, up and down movements were difficult at times. I'm looking forward to a basket of goodies at my fingertips this time (along with a very helpful 4yr old to go fridge digging for me heheh)!

Consider a note on your door for visitors!
This cute door sign idea from The Leaky B@@b (can't help but chuckle at that!) is perfect. It not only announces your bundle of joy, but also gives suggestions to visitors on what they can do to help! If you don't like this one, maybe it will give you some good ideas for how to word your own.

Don’t be afraid to accept any help that is offered:
If someone offers helps, let them! If there is ever a time that people want to help, it's after you have a baby, especially all the ladies. Most of them know what it's like and they only want to make life easier for you. Be grateful, thankful, and appreciative of course, but don't be afraid to say "yes!"

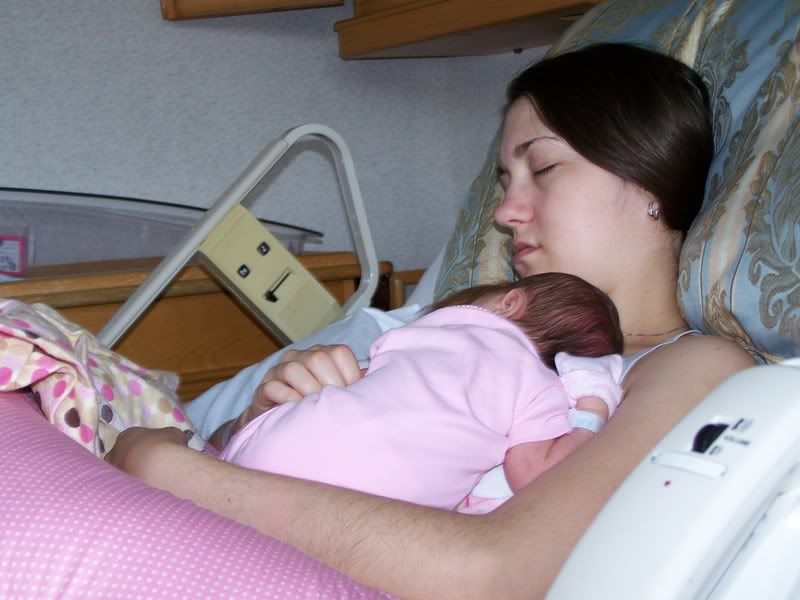
Sleep when baby sleeps:
PhotobucketPhotobucket

Sleep is almost non-existent when your baby comes, or at least you feel it is. When your baby drifts off, you have to drift off (same goes for Daddy, if you didn't already notice hehe)! Use a bedside sleeper, cosleeper, travel crib or pack n' play (here is what I used/use) so that your baby is near you. If it weren't for cosleeping I may have never slept. I had an insane pillow set-up for those times I would drift off while nursing her. You'll figure out what works best for you, but be sure to take safe precautions in whatever you do!

Follow all of your physician’s orders:
The one big thing I was advised to do after delivery was avoid stairs and driving for 2 weeks due to my episiotomy. Unfortunately for me we lived in a little townhouse where the bedrooms and bathroom were upstairs. Avoiding steps was impossible but I still could have handled it better. If I had been more careful my recovery time would have probably been significantly less.

Take lots of pictures:
Don't worry about killing every battery in your house, just take ten tons of photos!! I took so many with my daughter but wish I had taken more... crazy huh?! But my husband and I thoroughly enjoy looking back on them now and again! And now that our daughter is 4 she enjoys looking at her baby pictures as well.


My hope is that this information and the links provided are helpful to you in some way as you prepare for your new baby! It's obviously not an exhaustive list but don't worry. Don't overwhelm yourself and panic about everything! Focus on the things that are important to you (maybe breastfeeding, laboring techniques etc..) and let everything else fall in to place. No matter what, it will be a new experience and later on down the road there will be thoughts of what could have been done differently and what you can focus on with your next baby! That's why I did this list.

Most of all, love your precious gifts from God! Love them and enjoy every single second you have with them!

~Lisa~



Wednesday, July 25, 2012

From Girlish to Boyish - Travel Crib Repurpose!

Did you know?!?!
Bassinets aren't cheap! You're looking at anywhere between $70-$150+ for something your baby will sleep in for all of a few months in many cases. I was definitely not looking to spend that for our 2nd baby when I already had a perfectly good bedside sleeper/travel crib leftover from my daughter. However, it was just that... leftover from my daughter complete with the cute pink accents!
Nonetheless!! I was determined to make this work for our son!

0042

Initially I thought I'd make one big ruffled/pleated "skirt" to go all the way around the outside from top to floor. But that's a lot of fabric, and it's still not going to cover the inside edges or the bumper pads on the bassinet.
Scratch that idea.

Then I thought, what about making strips of fabric to fit each side just enough to cover the pink in length and width... but how on earth am I going to attach it to the crib? Brainstorming and internet searches were coming up empty but I was so gonna figure this out even if I had to go buy a large sewing needle and hand-stitch with thick thread!
I knew I'd be able to sew fabric on to the bumper pad so I wasn't too concerned about that part.

So here it goes...

There is truly no strategy here, I figured it out as I went so I'll show you some pictures of what I did, explain a little bit, then show you the final product. I don't expect you to drop your jaw in sheer awe because this just isn't one of those projects.

The best part about this is I haven't ruined the original product to where it can't be sold/donated later in its original condition once we are done with it. It's simply a cosmetic fix to get us through.
(hooray for seam rippers!)

Grab ya some scrap fabric (or go buy some, whichever!). I chose green and yellow from my stash.
I took a few measurements including the length and complete width, measuring from the bottom edge on the outside around to the bottom edge of the inside of the pink fabric in my case. This way once you attach the fabric it will fold over the side and cover all of the pink both inside and out of the crib.
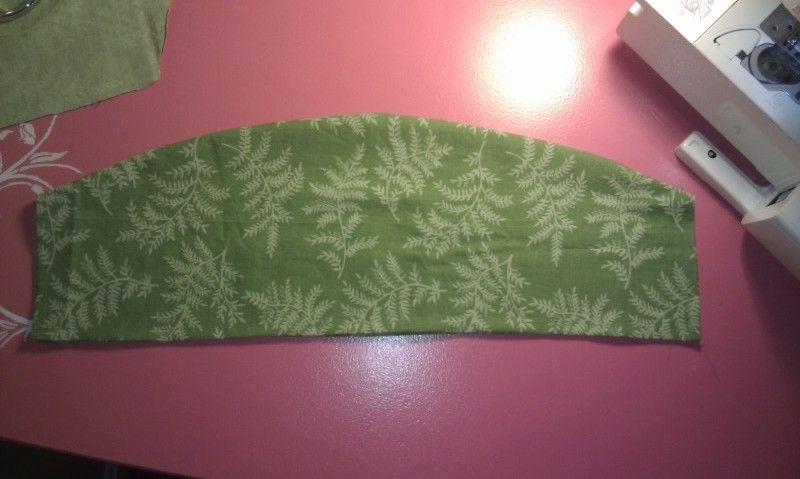
Cut your fabric along with a seam allowance, fold in (iron if needed) and sew up the edges all the way around. You will need 2 of these pieces, 1 for each long side.
Uploaded from the Photobucket Android App

The short edges might be a little more difficult since it's rounded on top, so I laid the crib on the ground on top of the fabric and traced it. Measure how tall you need the piece to be plus a little bit of seam allowance, then cut 4 pieces to match (2 for each side).

Uploaded from the Photobucket Android App

Fold in and sew the bottom and side edges of all 4 pieces.

Uploaded from the Photobucket Android App

Sew two of the pieces, right sides together, around the top rounded part only! Don't sew the bottom or sides! Once you've done that, flip it right side out. It should now slide easily over the short rounded side of your travel crib.

Uploaded from the Photobucket Android App

~~~~

On to the bassinet bumper...

Measure the inside length all the way around your bassinet bumper. Measure the height and cut your fabric to match that including a seam allowance. Fold in and sew your seam all the way around. My fabric wasn't long enough so I did have to attach a few pieces to get the appropriate length.

Uploaded from the Photobucket Android App


 This is probably the hardest part: Sewing your bumper fabric on. Make sure you have a good strong needle (like one used for denim) and a little patience to go slow. Shoving the end of your fabric in to a corner of the bumper, sew it from top to bottom to hold it securely in place.

Uploaded from the Photobucket Android App

Uploaded from the Photobucket Android App

Uploaded from the Photobucket Android App

Now you can start sewing the fabric on to the bumper. I started on top since that edge is easiest to reach with the machine and sewed down the length of one side as close as possible to the edge of the yellow fabric while keeping it as close as possible to the binding of the bumper. In the below photo you can see the stitching that was already on the yellow fabric and how my needle is positioned slightly to the right of it.

Uploaded from the Photobucket Android App

 On the top of your long sides you are going to encounter the plastic clamps that hold the bumper to the crib. Because those boogers are sewn down in to the bumper pad you'll need to sew around this a little differently. I decided to skip over that part then go back to it after I'd sewn the rest of the top on either side of the clamps.

Uploaded from the Photobucket Android App

Alright, got all of the top sewn now except for the section around the clamp as shown above.

It was actually easier to sew this part with the clamp on the left of the presser foot which meant doing a lot of shoving of bumper fabric in the tiny spot between the presser foot and the machine lol, that was interesting, but otherwise the little screw to the right of the presser foot would not have allowed me to lift the plastic clamp up well enough sew. Trust me, I tried to work around that.

Uploaded from the Photobucket Android App

Once you've finished sewing the top of one side, go back and sew across the bottom. That will give you one side completely sewn. At the corner where you meet your new side, sew down the edge as close to the corner seam of the bumper as possible (just like you did at the very beginning). 

In the below picture you can see how it's nice and secure and ready for you to move on to the next side and sew.


I made sure to be "safe" and not sew over top of the warning label. The yellow fabric is pretty see-through so it wouldn't look very good to cover it up. I just cut the fabric and sewed the edge along the label, then picked up with reattaching the rest of the yellow on the other side of the label.

Uploaded from the Photobucket Android App

 Finish sewing all the way around your bumper, top and bottom. Since I had cut a large chunk of yellow out for the label I ended up with a bunch of leftovers at the end. All I had to do was cut it off, fold the edge under, tuck it in the corner and do the last bit of stitching.

~~~~
The final step.... we get to attach those (green, in my case) edge pieces to the crib. I don't really have any pictures of that because there isn't much to show aside from how it looks once all the pieces are on. I decided to use safety pins. It took a little patience and finagling to get them on there and secure.

I'm not concerned about the baby getting to the pins because once the bumper is on they are covered up from the inside, and the crib will be put away long before he will ever walk or be able to mess with it.

Since the crib is wedged between my bed and the wall I opted not to mess with the cute pink skirt on the bottom aside from pinning it back on the one side that is visible. 

100_5905

For now I covered the mattress pad with the blanket that came with our crib bedding set. I will either buy or make a matching sheet to cover the pad eventually.

100_5906

***I would not recommend doing this with a full-size Pack n' Play unless you plan to sew on ALL of the fabric you add like I mentioned in the beginning. In general you've got the older babies in these and the safety pins can be a hazard!! This mini travel crib can be used like a Pack n' Play by removing the bassinet... if an older baby that can stand and reach the added fabric is put in it, you need to remove the fabric and safety pins.***

Overall this was a pretty simple project and with using leftover fabric from my stash it really didn't cost me a penny! I'm very happy with not having to go spend $100 on a new bassinet. I hope this will encourage and inspire you to save a little bit of money and consider repurposing!!