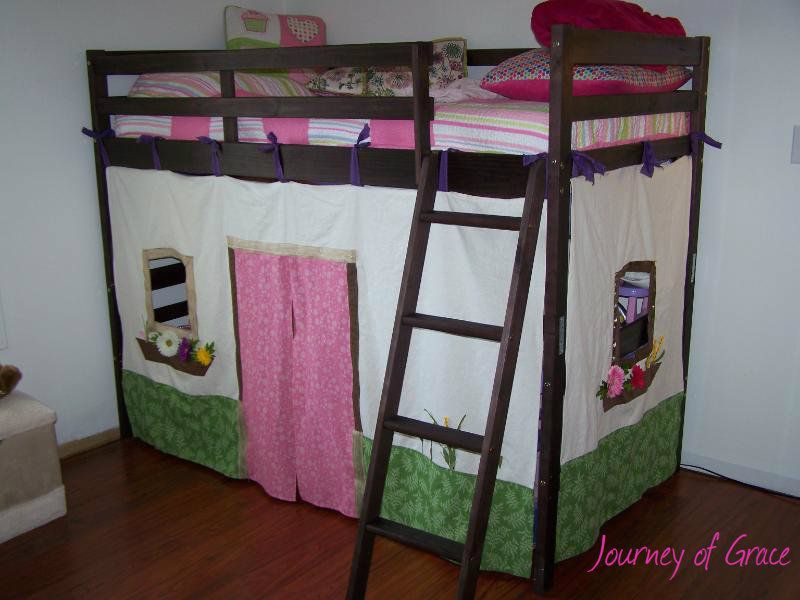
I just shared the canopy I made for my daughter's bed HERE. I split the posts because with all the photos it was getting to be a really long post once I added all this to it. If you truly plan to make a canopy read the entire tutorial first. You don't have to follow what I did, it just helps you where you may need some and gives a few tips. I made it up as I went and I'm not a fantastic sewererer so I know anybody could do it!
If I have the chance to make another one I'll clean things up and take my time. Maybe one day I can even make and sell them :)
***Heads up, I am no good at tutorials in my opinion. I put photos here to help out where I can but I'm absolutely
terrible at stopping long enough to take a picture of every step so
please forgive me. I also tend to over-explain and fear I confuse and lose people in doing so. I have read and reread this over and over hoping I could fix things that sound redundant or dumb lol. If you have any questions PLEASE
feel free to email me/leave a comment so I can get back with you! If there is something you would like a better photo of I'd be happy to take an additional picture and email it to you.***
Materials:
(This is what I used)
(This is what I used)
-
Hot glue gun, sciccors, a rotary mat (I do not have one, I just use the
big cardboard mat with the measurements on it) and of course your
sewing machine!
- Heavy off-white drapery fabric. I dug for a long time on a
drapery remnant pile and found about 3 1/2 yards of the perfect material
left for only $5 a yard. You can use a drop cloth, too. Just something
heavy and sturdy to give it weight unlike plain cotton fabric. I still
have a fair amount left over.
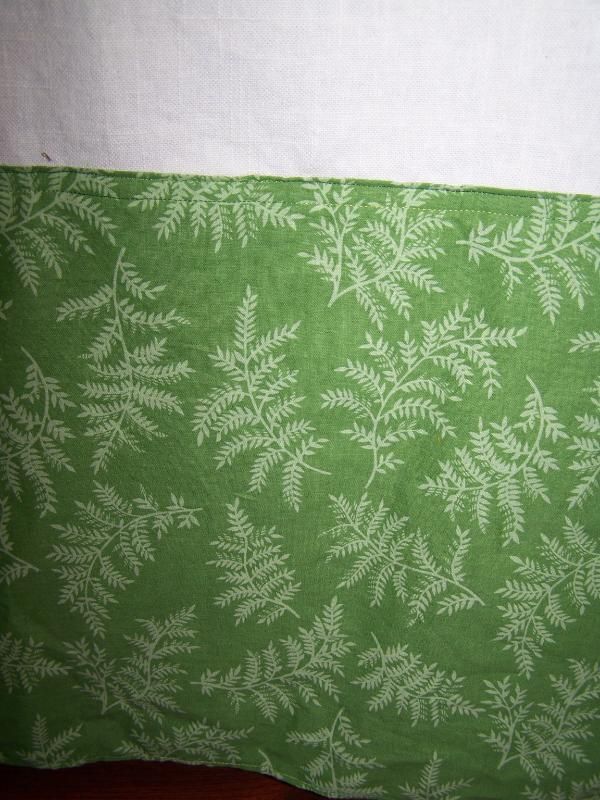
- Green fabric for the "grassy" bottom. I purchased about 1 1/2yds and used maybe half that.
- Pink fabric (ab 1yd) for the door. I planned to make window curtains but decided not to so I have about half a yard left.
- Brown fabric for binding and window boxes (if you choose to do binding). I believe I purchased 1/4 yard.
- Purple fabric for the ties. Also bought 1/4 yard.
- Burlap ribbon that I had on hand and used last minute.
- Thread. I used green, white and pink. I note in each section what color I used.
- Gerber daisy and misc. flowers I had leftover from my Spring wreath (still need to post that project!)
Initial Measuring & Cutting:
First
grab your measurements from the bed. It is intimidating once you get all the
numbers. This is the most tedious part IMO because if you mess this up
you risk messing the whole shebang up, so take your time, double check
measurements and #'s, write them down, THEN do the cutting. Let's just say lucky me I had
enough of the drapery fabric ;)
- You want width of the front of the bed, inside the posts.
- Height of the front of bed inside the posts
- Width of end of the bed inside the posts
(the height can be duplicated of course)
I decided to use about
12 inches of the bottom as the grass. Keep this in mind now, whatever
measurement you want for the bottom, because it helps you determine the
height of the drapery fabric.
(DON'T CUT THE GREEN GRASSY BOTTOM
UNTIL YOU HAVE THE DOOR CUT OUT OF YOUR DRAPERY FABRIC!!!)
I subtracted the 12
inch grassy bottom from the rest of the height measurement to get the
length for my drapery fabric +2 inches, that way the top and bottom both
had a 1 inch seam allowance (s.a.). With the width measurements I also added 2 inches for
a 1 inch s.a. on both sides. You'll need 2 (or 3) cuts of the drapery
fabric. I only cut 2 because the other side of the loft bed faces a
wall. Make sure you have that 1 inch s.a. all the way around.
Initial Sewing:
- I used white thread
Start
ironing your s.a. ONLY on the top and bottom of your draper fabric!!
You'll do the sides later once you get the green fabric on. Iron it in
again so that you tuck the raw edge under and end up with 1/2 inch seam.
Pin as needed and straight stitch in either a coordinating thread with
the fabric or a thread (like green or pink) that matches another fabric
in the canopy. Do this with your 2 (or 3) sides... remember, top and
bottom only for now!
Cutting Windows & Doors:
Here comes some more brain work...
We need windows and a door! I used a square photo frame to trace and
cut my windows out. Too lazy to sit there and figure out measurements. I
started with the side piece of drapery fabric. Fold it in half so you have a crease
running from top to bottom. Press the crease a little with your hands so
that when you unfold it you can see the crease slightly. Lay it back
out flat then lay your frame on top of the fabric where it is basically
centered over the crease. Adjust how high up or down you want the
window. Once you like its position, trace around it with a pen (or
whatever you trace with). Cut out your window along the line you drew!
I
took the side piece and laid it over the larger piece of fabric where I
wanted the window on the front half to be. It was easier, that way the windows are centered the same. I just lined up the
left edges so my window was on the left side of the front piece. I traced the hole (that I cut out on the side
piece) on to to the front piece that was laying underneath. Pick up and put aside the side piece. Cut out the front piece
window and, voila! You have two windows!
Then came the
door. This took some real measuring unlike the windows. Like I did with the side piece for the window, I
folded the large front piece in half to get a slight crease down the
center from top to bottom. I used that crease as my center marker for
the door cut out. I can't remember how high up I cut.. but remember you
still have the grassy green to put on so however tall you want the entry
to be, subtract 12 inches!! I think my entire door height is about 36
inches, so if that is the case, I only needed to cut up 24 inches in to
my drapery fabric. Don't cut your door up so high to where it is within inches of the very top of the fabric. You'll want some distance between the top of the door and the top of the canopy for sturdiness. For width of the door I went out 10
inches from the crease on either side so the door is 20 inches wide.
Still with me?! I hope so!
Grassy Green Pieces:
-I used green thread
Now
you can cut your grassy green! Just measure the two front spots and the
side spot. Since I wanted 12 inches of grassy green I measured 13 1/2
inches. I wanted the very bottom to be a 1/2 inch seam allowance (s.a),
and the top that attaches to the drapery fabric to be a 1 inch s.a.
Obviously once the raw edge is folded under again it ends up being 1/4
inch at the bottom and 1/2 inch at the top.
For your two front pieces of green (that hang on either side of the door):
Since
the outsides of the drapery fabric are not yet sewn, measure it straight
across and only add a seam allowance for the side that ends with the
door frame. Iron/pin your s.a. and straight stitch the seams of the top, bottom and door side of the green fabric.
For your side piece of green:
Straight stitch the seams of the top and bottom only. Don't do the sides. They will be sewn after you attach it to the drapery fabric and close of the outside raw edges of your front and side pieces.
Now you can attach all your green pieces to the drapery fabric. I chose to have the green lay on top of the white so that's how I pinned it on (so that the 1/2 inch sewn seams overlap). Make sure the seamed edge lines up with the raw edge door frame before you pin. If
the outside raw edge of the green doesn't line up perfectly with the
white, don't worry. It shouldn't be off too bad if you measured pretty
well. You'll fix that when you iron and sew that seam next.Straight stitch two rows about 1/4 inch apart across the seams to attach the green to the white.
Once you have all your green attached you can now sew the seam of the 4 total outside raw edges. I used a 1 inch s.a. so that I got my 1/2 seam. This will stretch from the top of the drapery fabric all the way to the bottom of the green fabric. Straight stitch all the seams. You should now have all outside raw edges of your canopy sewn! The draper fabric on the door and windows will still be raw edges.
Framing Your Windows:
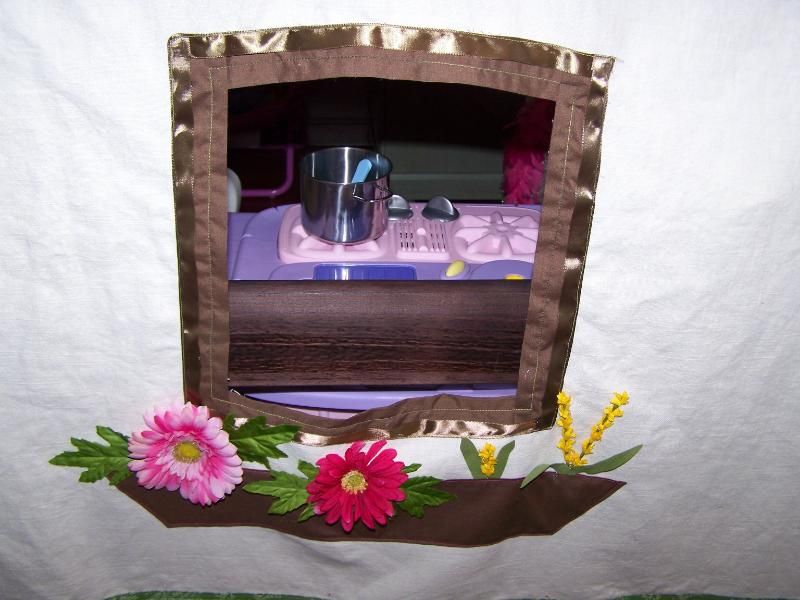
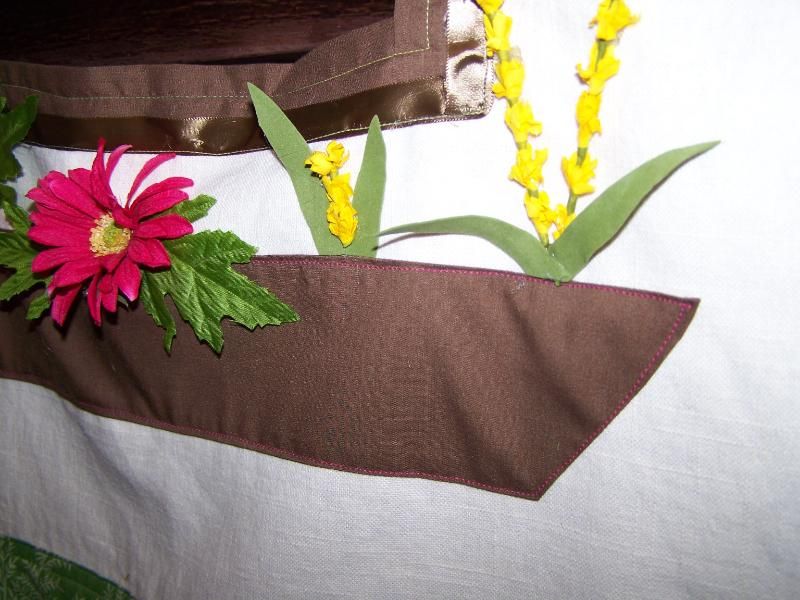
Obviously both of my windows look different. I started with the side window (one pictured on the right), trying to do binding. Bleh, I gave up on that. Trying to get folded edges and the corners and all that looking nice was a no go. I literally laid 4 pieces of fabric that were ironed and folded in half length wise around the window. The folded edge of the brown lays slightly over the raw edge of the frame to cover it up. I straight stitched the brown on. I then used ribbon to cover the outside raw edges of the brown fabric. I hot glued that on then stitched the outside edge of it. <--- Very lazy and I didn't do much thinking to come up with this. It was very spontaneous and it just happened to work, kinda.
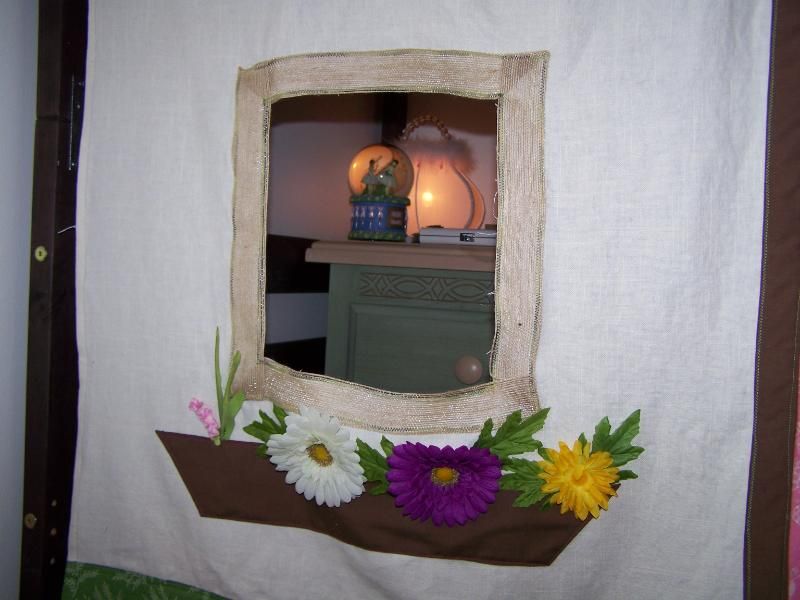
Then I remembered I had burlap ribbon. I used that to cover the other window edge, making it hang over the raw edge a little so it couldn't be seen.I zig-zag stitched the ribbon on the inside edge that was still on the drapery fabric to seal up that edge, then zig-zag stitched the outside of the ribbon to finish it off. (Zig-zag was used because the ribbon is separate little lines of string all attached together.)
Door:
- I used green thread
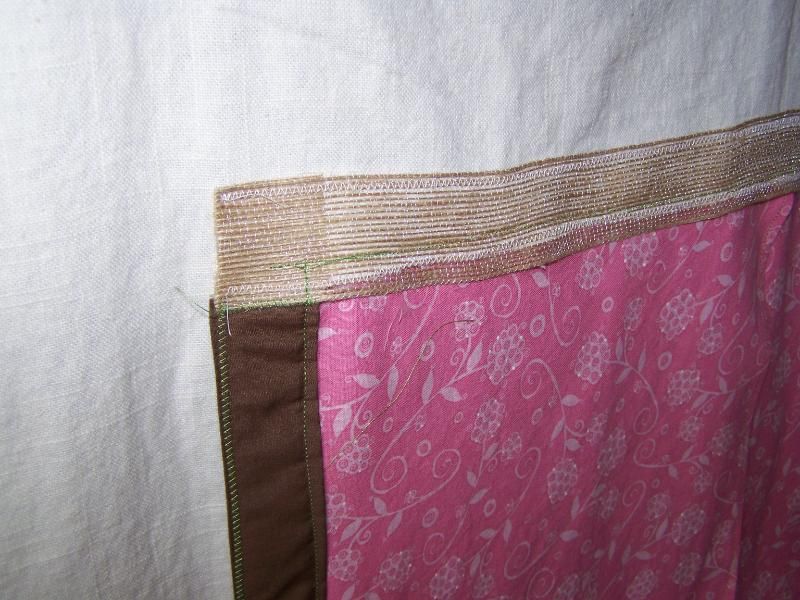
Improvising.... I ran out of ribbon, well, obviously there wasn't enough to do the door frame entirely so I chopped it up and put the ribbon on the bottom over the green, and across the top. I used more folded brown fabric for the door. This time I measured the brown fabric out length wise, and made it about 3 1/2 inches wide. I folded one long edge in 1/2 inch and ironed it, then folded in 1 1/2 inches (the width of the ribbon) and ironed again. This allowed me to wrap the brown ribbon around the raw edge yet have 1 1/2 inches of brown fabric on the outside that lined up with the ribbon... no raw edged visible! (I need a photo of this, but there is probably a better way to do it)
I straight stitched the brown fabric on, then zig-zag stitched the ribbon on.
Door Curtain:
- I used green thread
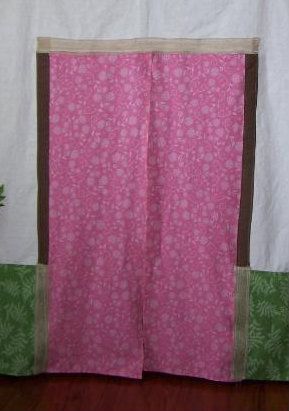
For the door curtain I cut 1 piece of pink fabric the height of the door + 1 inch so I could sew it to the inside of the top. I added 2 inches to the width of the door frame so I could sew the sides to the inside of the door. It was something like 37 inches (36 inch tall door opening) by 22 inches (20 inch wide door opening). I folded the piece in half length-wise and cut it down the center. I sewed the inside edges and bottom of the curtain pieces using a 1/2 inch s.a.
With the front canopy piece laying face down, I laid the pink fabric face down and lined it up how I wanted it to hang. I overlapped the center (sewn edges) of the fabric by maybe 1/2 an inch or so, pinned all the outside edges of the pink to the rest of the canopy and sewed it on. I used the green thread and tried my best to go over the same stitching I had already done on the framing of the door.
Window boxes:
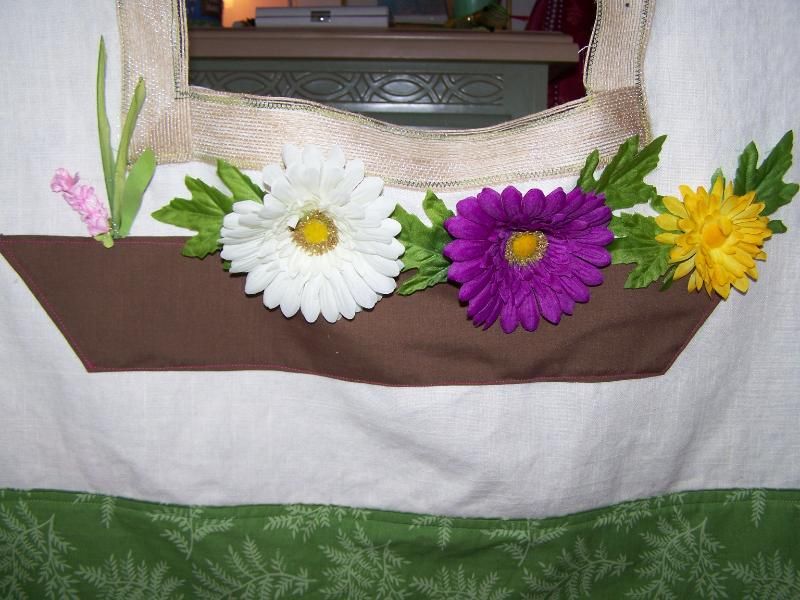
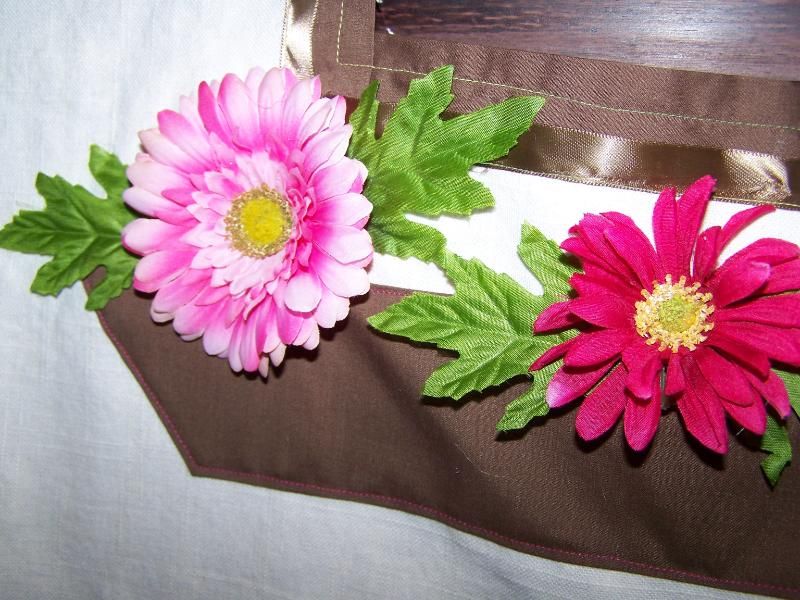
This was pretty simple. Measure out how tall and wide you want your boxes. Cut out the fabric. Fold it in half then cut the short sides at an angle so that when you unfold it you have what you see above. Carefully fold and iron the edges under by about 1/4 inch all the way around to get rid of the raw edges, then pin and straight stitch on to your canopy.
Hanging Ties
-I used green thread
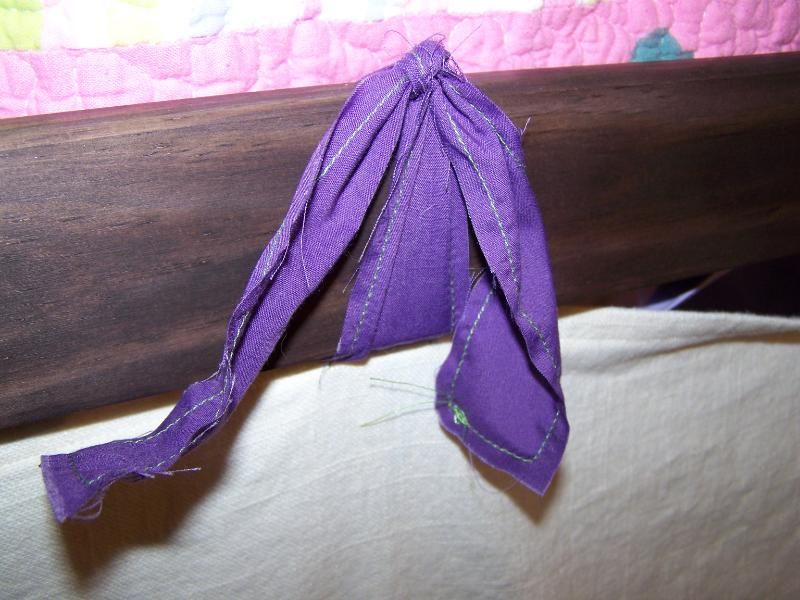
I chose a deep purple, almost royal purple, for the ties to attach the canopy to the bed. I also picked out Velcro to use in between the ties just in case there wasn't enough support. Luckily I did not need it but I'm happy to hang on to it for 40% off! I cut several long purple strips, probably about 12 inches or so long and 1 - 1 1/2 inches wide. This is not an exact science... just going with the flow! I needed to make sure I had enough to wrap around the bed rail and still have some left to tie so keep that in mind when cutting the length.
I then went super lame and instead of cleaning up edges and sewing fancy and all that jazz, I took the strips to the sewing machine and straight stitched green all the way around the strip a little less than 1/4 inch from the raw edge. Again, not an exact science and doesn't need to look perfect. That will protect the edges a bit. Since I don't plan to take the canopy down often, or at all if I can avoid it, I'm not worried about the raw edges :)
Attaching them to the canopy:
(something else I need a good photo of)
I folded the front piece of the canopy in half, wrong sides touching. I opted to put one tie in the very center (where the fold is) right above the door. One tie on both ends, then 2 ties in between so that gave me a total of 7 ties on the front piece. I folded the ties in half to get the center, laid them back out flat on the outside of the top seam and pinned it down. I stitched across the inside of the tie (that is laying on TOP of the seam) twice... once at the top of the drapery fabric seam and the other about 1/2 inch down. This will hold the ties on to the canopy pretty well. Make sure you back stitch your ends that way they don't unstitch and pull apart under the weight of the hanging fabric.
Decorating Your Canopy:
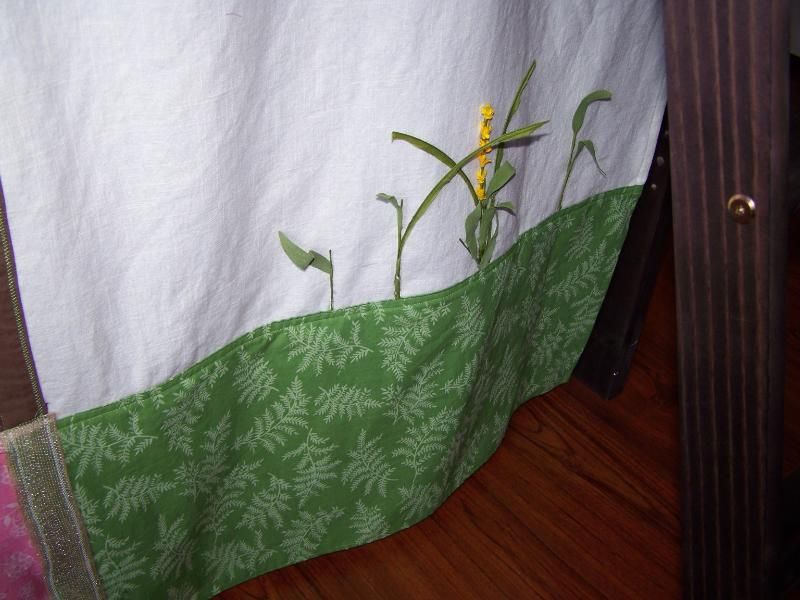
Ok, we are ALMOST DONE!!! Wooooo! This is the fun part... decorating your canopy however you'd like. Ididn't go all out at this point, just kept it pretty simple with flowers. I used Gerber Daisies and another little flowery thingy I had in a stash leftover from a wreath I made. I plucked them off the stems along with the leaves and hot glued them "in" to the flower boxes. I added some other little flowers to the spot that is under the ladder so that section wasn't so bare. I'm still hunting down these little curtain butterflies I have had forever so I can maybe glue a few butterflies on but no luck so far.
Hang your canopy tightly on to the outside rails of the bed and let the kiddos enjoy your fabulous creation!!!
Please, if you have any questions let me know!
~Lisa~



That is amazing Lisa, I bet Jaiden Loves it!!!! I wonder if Hannah would like something like that?
ReplyDeleteJust stumbled upon your blog and this is amazing! You should sell these! I would be your first buyer. :)
ReplyDeleteI've thought about it, just have to figure out how I would go about doing it. Plus I'll have a new baby in a few months so I'm afraid to get too into marketing it to sell, but I know I'd love to eventually!
ReplyDeleteYes.
ReplyDeleteIt's a great idea. My daughter would like one too. And she has a Dora kitchen so how fitting. :)
Jess