Monday, April 1, 2013

Natural Face Cleanser & Make-up Remover

 photo 7280636f-c0c4-4d35-97f6-b69480dc956b_zps161d081e.jpg
 
 
One of my favorite homemade health & beauty products so far is the natural face cleanser I found at The Prairie Cottage. Shelley shared this simple 4-recipe cleanser that got pretty good reviews from followers.
 
If you're new to natural cleansers this one may sound completely strange to you... olive oil?! It is actually a great cleanser all by itself. You can read up more on it here at TheOilCleansingMethod.com but the basic concept is that you're replacing the bad, hardened oils in your pores with fresh clean oils!
 
On to the very quick process. You'll need:
 
2 teaspoons liquid soap (I used Dr. Bronner's Almond castile soap)
2 tablespoons water
2 tablespoons glycerin (found at GNC or health food stores) 
1/2 cup olive oil   
 
 photo ec624c15-6b85-49f0-80c6-594313f22d4f_zps2cdcf333.jpg

Add the ingredients to a food processor or blender if you have one. I used my Ninja. Mix it until everything is well-blended and creamy. Pour it over in to your pump bottle and there you go!

I doubled my recipe which fit perfectly in a Wolfgang Puck spaghetti sauce jar (pictured above). Most of it is now in the pump but the jar works great for extras and is left under the bathroom sink to refill the pump as needed.
 
 photo 20130322_010725_zps58edfeb9.jpg  
 
This stuff is an AMAZING moisturizer and make-up remover. I used to use coconut oil as my eye make-up remover (which worked wonderfully btw) then wash with some other random cleanser then follow up with a small amount of coconut oil for my moisturizer. This new cleanser completely eliminates that three-step process and puts it all in to one!
 
I use a couple pumps in the bath, or at the sink. Massage it well all over your face and neck and gently around your eyes especially if you have mascara or eye make-up on. Then gently wash away with a wash cloth and warm/hot water, whatever you can stand. You may need to rinse the cloth then gently wipe away again, but don't be intimidated if your face feels slightly oily. This is ok. You don't want to strip your face dry because then you will over-produce oils to make up for it then you're back at quare one.
 
My husband does not like this. He said he used it a few days and swears it is the reason he broke out worse. Don't tell him I said this but I think he didn't give it a fair shot. I am planning to try a different recipe for him. He's stubborn and probably won't touch this stuff with a 10 foot pole again!
 
 
Try this out for yourself, I think you'll totally love it! Leave me and/or Shelley at The Prairie Cottage your feedback :)
 
~Lisa~


Tuesday, January 29, 2013

Cloth Diaper Follow-Up

Uploaded from the Photobucket Android App

It has been an exciting 4 months here in my cloth-diapering household! I'm proud to say that my son hasn't had a disposable diaper on his bum since he was about 2 weeks old! I've been meaning to come follow-up with how we're doing, what we like and don't like, and especially tell you how my DIY inserts have worked out.
My son has been oh so gracious as to let us experiment with his toosh. We haven't been too rough on him I don't think.
I LOVE LOVE LOVE a fluffy butt!!
I feel fantastic not tossing diapers in the trash can only to be sent to the curb to die (or live rather) in a landfill.
I don't have to run out to the store every or every other week to buy wipes and diapers because I ran out.
We have yet to have a oober poop blowout. I remember disposables with my daughter could barely handle a poop. These things can seriously handle a nightmare!

Here's my booger
IMG_20121225_123432IMG_20130125_192745

Here's my booger and his fluff
IMG_20130125_120853

Inserts & Diapers
Several months ago, back before my little dude came peeing in to the world, I posted about my DIY inserts Part I & Part II

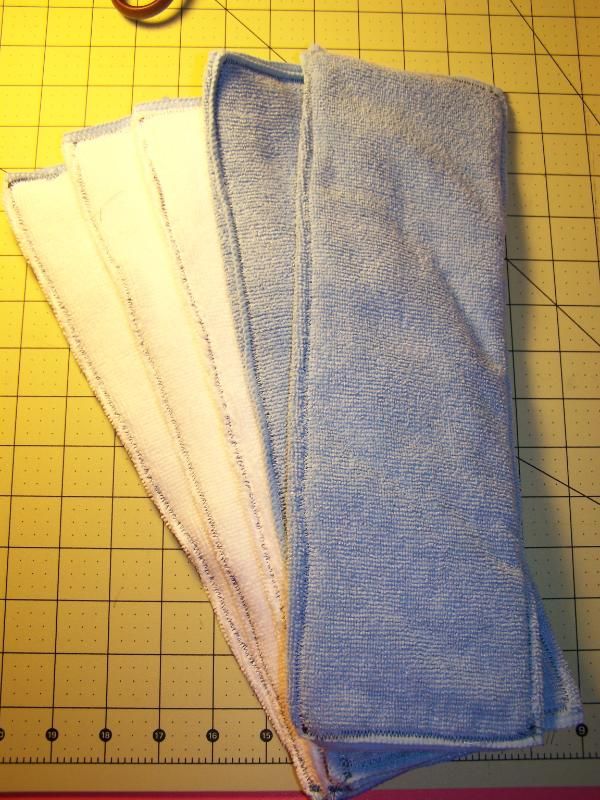
Part I were the blend inserts with fleece and microfiber.
Photobucket

Part II were the microfiber.
Photobucket

My goal was to use the blend inserts for my gDiapers. Since this is a follow-up I'll be honest:
 They did not work for my son :( I'm not saying they didn't work. They definitely absorbed pee but it was very quickly evident that I had a heavy wetter. They actually did better, in my opinion, than the actual gDiaper brand inserts. Despite them not working in the gDiapers for us they eventually found a place as a doubler in overnight diapers. More on that later...

When my son came home from the hospital we began using the tiny gDiapers with disposable inserts. It was far easier than using the cloth. You're changing diapers every hour and unless you're just gung-ho you don't really want to wash inserts every other day. I didn't. It was much easier to wash the gDiaper covers in a regular baby laundry load. Plus the entire gDiaper set was a gift that included two packages of disposable inserts, why not?!
This is one of the only photos I have of him in a tiny gDiaper
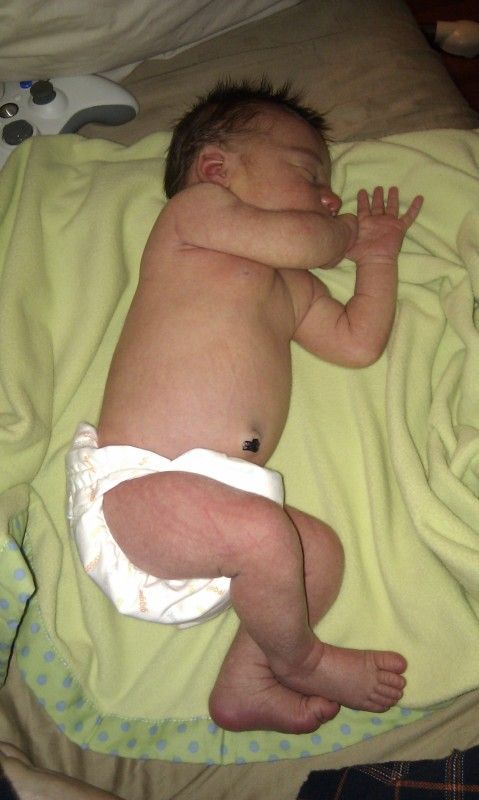
Uploaded from the Photobucket Android App
You can read more about gDiapers (including the tinies) at Joyful Abode. She helped convince me!

I LOVED the tinies. They were just so adorable, and although I was stuffing them with disposable inserts it felt great using the cloth. The set came with 12 which worked perfectly for the first 2 weeks. He came home weighing just a tad over 7lb and they fit him til he weighed approximately 9lb. At that point we were getting frequent leaks which meant it was time to move up.

Once he grew out of the tinies we put him in the smalls (we had 8 covers/liners and washed with regular laundry as needed). These were just a little bit too big in the legs at first with using the gCloth, which going back to the above, we learned did not absorb very well for him at all. I started stuffing them with the 5 layer charcoal bamboo inserts which were thick enough and absorbed enough to work beautifully! 
Photobucket  
Photobucket
The charcoal bamboo are longer than the small gDiaper liner so you see a large bump on the front of his diaper due to folding it over. The inserts not only fit better that way but also provided more absorption where little boys need it most.

The smalls fit him until he was 6 or 7 weeks old. We began to get leaks again so it was time to go for the OS (one size) diapers. In order to get a good fit with the OS I was usually double stuffing with charcoal bamboo & my DIY inserts (blends & microfibers), ESPECIALLY at night. We no longer double stuff daytime diapers.

Just a quick note... in one of my original diaper posts I mentioned I ordered newborn Alva brand snap diapers. These were a no go for us. By the time they fit him in the leg area the leg gusset was too thin and any poop or pee would spill right out. They were an awkward fit for us. so I ended up selling them therefore decreasing my stash by 12 diapers :(

Anyway...
One of my early favorites
Uploaded from the Photobucket Android App 

Our changing area
Photobucket

100_6190
The diaper pail is a basic trash can with a lid I bought from Walmart for I think $10-$15? I made a liner out of a shower curtain and sewed a little yellow fabric to it. It worked great for a few months but recently tore along one of my sewn seams. Not anything I recommend unless you just want to take a stab at it and need a cheap liner alternative to hold you over. I won't even make a tutorial for it. I currently use a massove Bububibi brand pail liner.

When possible I try to pre-stuff all the diapers to make it easier to grab and change. Sometimes it's not possible due to working full-time and everything else that's on my plate so we stuff as we go.

Our general rules of diaper stuffing:
Daytime diapers can be stuffed with the white cotton bamboo (a 5 layer insert; 2 layers of cotton and 3 layers of microfiber) but preferably CBI (charcoal bamboo) and night time diapers must be stuffed with CBI and either MF (microfiber) or a DIY blend. 

Cloth Wipes
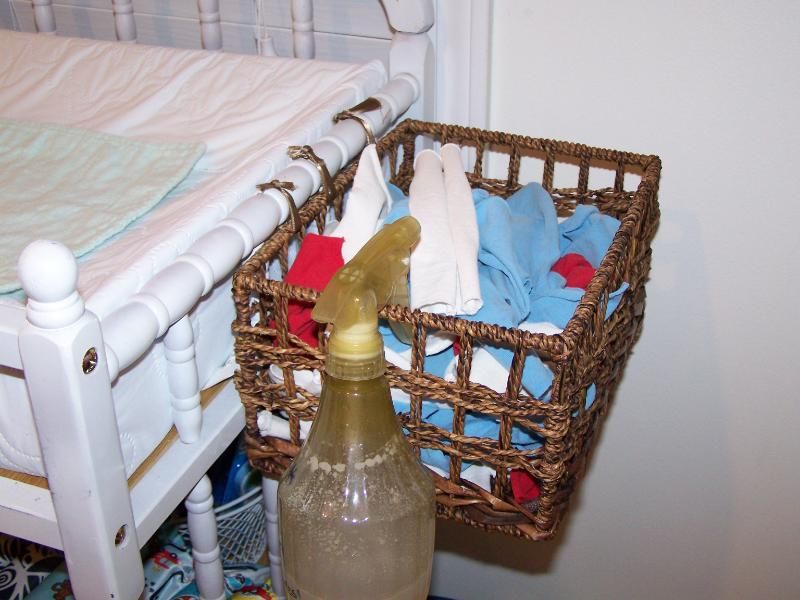
I used to use disposable wipes in my bedroom for nighttime changes. Now that he sleeps through the night with the same diaper (not that he actually sttn... just keeps the same diaper on lol) I only use disposable wipes in the diaper bag. 
Photobucket 

For regular household use wipes I went the free route and stripped several of my husband's old shirts he gained over the years from working at Blockbuster in a load of original Dawn dish soap. I then cut about 3 shirts in to 60 or so small wipes about 6x6-7x7inches. My wipe solution is water with California Baby brand wash mixed in, (about 1 tbsp in the size bottle you see) and a couple drops of Tea Tree essential oil. Give it a generous shake before spraying, apply it to your wipes and wipe away!

The most amazing aspect of the entire cloth diapering process is... my husband doesn't complain a bit about it! He was very concerned about my plans when I was pregnant but I believe he knows that I had made up my mind and gave in. Giving in turned to "if it saves us money, let's do it" and saving money turned in to his incredible flexibility with everything I do. He gives me feedback on what diapers work or don't work. He even occasionally helps me with laundry.... that's a touchy subject. The washing routine is something I'm insanely particular about so the most I usually let him do is run an extra rinse cycle and toss them in the dryer if I didn't have time. My next cloth diaper post will revolve around washing routine. I hope to share step-by-step photos and resources for you to help get the routine that will work best for you.

If you have any questions about anything discussed here please feel free to contact me or visit my Facebook page. As with almost everything I do, it's a learning process so my methods may change down the road but I'd love to help in any way I can if you need it.
Stay tuned for my washing routine and cloth diaper investment posts!

~Lisa~

Tuesday, January 22, 2013

Part II - The Breastfeeding, Pumping, Working Mom

In Part I of my Breastfeeding, Pumping, Working Mom series I introduced you to some information that will get you started in the right direction to be successful at continuing the breastfeeding relationship with your child once you return to work. Now I would like to introduce you to how I manage it!


I work 10 hour shifts 4 days per week. I'm a telecommunicator for a police agency. There are always two of us on duty at a time (during the times I work at least) so when one breaks the other handles the job. There is no predicting what will or will not happen so taking a lunch or pump break is a gamble. Always has been, always will be. We just hope the worst holds out til the other can get back! I sometimes try to take a portable radio with me so I can keep up with how busy things may get.

A well-rounded pump break
Uploaded from the Photobucket Android App


What my pump bag consists of:

I have the Medela Freestyle pump which comes with a very convenient shoulder bag. It also comes with a small cooler that I sometimes carry with me to place my bags of pumped milk in for discrete and more sterile storage in the refrigerator.


The pump takes up next to no room in the bag leaving plenty of space for (my) necessities:
  • Pump, tubing, and charger/batteries - You really can't pump without the pump...
  • Flanges, valves and membranes - Other essential parts to the pumping process!
  • Nursing pads - I prefer the disposable Lansinoh nursing pads. I do have some reusable pads but they don't fit very discretely, at least not the ones I own. I'm considering purchasing a better brand. 
  • Lanolin cream... just in case - Pumping can be kind of rough for first timers or anybody with cracks or cuts so using lanolin to help lubricate the flange/nipple may come in handy. 
  • Extra storage bottles or freezer bags - I only carry two pump bottles with me (with lids) and a stash of freezer bags. I pump in to the bottles then transfer to the bags.
  • A ballpoint pen - You will want this to label your storage bags
  • Wet bag or large Ziploc bag - I use a small wet bag (like you'd use for cloth diapers or swim suits) to store my pump parts in.
  • Hands-free pumping bra - That says it all!
  • Hand/Paper towel - When I take my bra off and remove the flanges milk always drips. Even if I do my best to get everything in to the bottle it is inevitable. Laying down a hand towel or burp rag for you to put on your lap/table to catch the drippies is a helpful tool.
  • Quick clean wipes - I use the Medela brand.
  • Baby clothing item or baby photo - Having a baby clothing item such as a receiving blanket or a photo of your baby with you can help your pumping output and inhibit letdown. I personally do not do this with my son but did it with my daughter.
IMG_20121106_180209

A typical night of pumping at work:
After I had my daughter in 2008 I went back to work at 12 weeks. At that stage breastfeeding is well established in most cases and you likely know about how many times you'll need to pump per shift to keep from getting overly full and to ensure you are getting enough milk. I pumped 4 times per night in 15 or so minute increments for probably 4 or 5 weeks. I began to do my research and learned that I was over producing a LOT, and that my little girl was over eating  LOT. I was seriously pumping about 30 ounces. We started putting the tips on How to bottle feed the breastfed baby in to play. I was then able to safely, without risk of not pumping enough milk, cut back to 3 times per night, sometimes I would only pump twice. I loved pumping then. It made me feel good about myself and gave me a sense of pride!

With my son I started back to work at 4 weeks post-partum. At that point my milk supply had not really leveled out and I got engorged fairly quickly. I pumped 3-4 times per night every couple of hours if possible. I hated (and still slightly dislike) pumping... My son hated not having mommy so the feeling was mutual! He wasn't eating much and once again I was way over-producing. After a couple of weeks I reduced pumping to 2-3 times per night. At the same time my son began to take bottles a little better and got on a more normal routine. I have been back to work about 3 months. I typically pump in the middle of my shift and then again when I get home at night. Sometimes I will manage to pump twice per shift and not have a need to pump once I get home. I have been maintaining my supply this way for approximately a 4 weeks.

My son will take anywhere from 10-16 ounces when I'm working. I pump between 14-20 ounces per shift.


***Keep in mind that I over produce considerably in terms of average pumping output. In 15 minutes I can get upwards of 10oz total. Some people will get far less, and there are a few that could get far more especially if you have more time. It will also depend on how long it has been since you last pumped/nursed.

This link will give you an idea of what is normal and what is abnormal: I'm not pumping enough milk. What can I do?***


Storing your pumped milk:
I transfer my milk in to freezer bags once I'm finished pumping. I date my bags, list how many ounces are in the bag and give the bag an inventory number. Yes, I inventory my milk. There is a slight obsession I have with keeping count of how much milk I have in my freezer. I'll get to that in a minute.

In the early weeks they suggest you freeze/store in small increments, like 2 ounces, because in all likelihood your baby will not eat that much if you introduce a bottle early, and they don't want you to risk wasting milk by thawing out too much. I always store in 4-5 ounce increments. The Lansinoh storage bags I use hold up to 6 ounces but to be safe 4 to 5 is my preferred maximum. That works for us. You can follow the Breastmilk Storage & Handling guidelines to help make the choice of how many ounces per bag you'd like to freeze.

At the end of the night I come home, add the milk I pumped to inventory sheets I have printed then place them in the freezer. I printed out several pages of an Excel spreadsheet that has Date, Inventory #, Ounces, and a column for notes. That milk then goes in my kitchen freezer before later going in to the deep freezer (which is inconveniently placed in an outside closet). I sort my milk in rows sequenced by inventory number. About 15 or so bags are put in a small basket that I set in the kitchen freezer for my husband to have easy access to throughout my work week, and also limits how often the deep freezer is open. He thaws one bag at a time as he needs them.

My milk is used on a rotation ensuring I go back and use the oldest milk first. Breastmilk can be properly stored in a deep freezer for 6-12 months. Rotating my milk will keep anything from going bad that way down the road I can donate the freshest milk possible when Maddox weans or I decide to stop giving him expressed milk.

This is my inventory sheet, basket of milk for hubby to use, and the unfortunate pile of milk I have gathered in the freezer that needs to go to the deep freezer... it's been too cold to go out there and sort it!
Uploaded from the Photobucket Android App

Cleaning & Storing your pump parts while at work:
In my list above I suggested using a wet bag to store your parts when you are finished pumping. The awesome thing is you do not have to clean your parts in between every time you pump! As long as you have a refrigerator available you can use the parts again without washing. It only makes sense... as long as they are kept cold (just like your milk) they are safe to use again. A plastic bag will work just fine as well. Make sure you wash the parts at the end of the day.

If you need or want to clean your parts at work just make sure you have your basic necessities; dish soap, bottle brush or rag, and a towel/rag for drying. You can also use the microwave steam bags for sterilization. Be sure to thoroughly rinse the parts before using the steam bag. You can also sterilize them in the bag after a thorough soapy washing.

Worst-case scenario option: Clean wipes. Medela, and a few other brands, make clean wipes you can use to wipe your pump parts in the event you need to pump and a cool storing place or water is unavailable. I have a pack of these that stay in my bag. I rarely if ever use them for my parts but they come in very handy at cleaning my pumping area. The room I use is also used occasionally during day-time hours for other departmental needs so I like to keep the desk clean. Breastfeeding is a wonderful thing. Breastmilk drops for others to see and deal with are not.

~~~~

That about does it... then we start all over the next day! Once you get back to work you'll get a routine going. Everybody has their own environment with different available options and needs. My goal is always to provide what information I can in order to help you succeed in yours.

If you ever have any questions please leave me a comment and I will get back to you ASAP!


~Lisa~

Sunday, November 25, 2012

Crescent Wreath: Chicken Coop!

100_6306-1
 
I love it when we don't have a lot of groceries in the house. (We really need to go to the store soon...) It forces us to improvise meals. Sometimes it's lame, but occasionally we get a winner! Bryan asked if we could figure something out with the crescent rolls. His idea was a Parmesan chicken style meal. I did a little recipe hunting but didn't have any solid luck so when I got home from work it became a matter of digging things out of the cabinet and taking it from there.

First of all, the chicken was not thawed. I forgot to have him pull it out of the fridge this afternoon. Fail :(

Quick solution: Boil the chicken! WIN!

No joke, this is the first time I have EVER boiled chicken. 

Boiled chicken is fantastic!

While the chicken was boiling I gathered my thoughts and this is what I came up with:

Photobucket
Plus mozzarella cheese... can't forget the cheese!

2 large boneless skinless chicken breasts (or approximately 1 regular package)
2 cans original Pillsbury Crescent Rolls
1/4 a can Hunt's tomato, basil, garlic & oregano sauce
1/8 C Parmesan and Romano cheese
1/8 C seasoned Italian bread crumbs
2 tbsp Olive oil (I substituted about 1/2 tbsp with my Tastefully Simple Balsamic & Basil dipping oil for added flavor)
About 1 1/2 C shredded mozzarella cheese
(Each crescent roll is approximately 200 calories, give or take a few)

I came up with a quick name... Chicken Coop. No idea why but it sounds cute. I realize chicken coops are kind of funky. Embrace the name and give it a shot ;)

~~~~~~

If you have a pizza stone that will cook this beautifully. If not, a cookie sheet will do.

Boil your chicken for approximately 30 minutes. In a small prep bowl mix Parmesan and bread crumbs. 

Preheat your oven to 375 (as directed on the crescent roll packaging)

Once chicken is done place in a large skillet. Use a spatula or your hands, whichever, and break/shred the chicken apart. Once you get it broken in to 1/2 to 1 inch pieces drizzle Olive oil over the chicken and add the Parmesan and bread crumb mixture. Toss to evenly coat with mixture and heat on Medium for about 10 minutes.
Photobucket


While chicken is heating in skillet lay out your crescent rolls in a "wreath" pattern around the pizza stone. You'll probably have some pieces leftover from the last can. Keep those to the side once you have completed one circle to add to the middle once you've finished up making the outside part.

Spread chicken around the wreath evenly on each crescent roll.

Photobucket


Using a small spoon scoop out the tomato sauce and lay it over each bunch of chicken then sprinkle mozzarella over top.

Photobucket


Fold the crescent rolls over the yummy mixture!

Photobucket


Add the remaining crescent rolls (if you had any) to the center and repeat the above steps. Place in the oven for about 10-15 minutes.

Photobucket


  When the crescent rolls begin to brown pull the stone out and sprinkle a little cheese on on top. Place back in the and broil on low for about a minute. Keep a close eye on it when you broil or you will very quickly have a burnt dinner!

Photobucket


  Scoop a few pieces on to your plate and enjoy the awesomeness you just made :)

Photobucket

 ~Lisa~
 

Sunday, November 11, 2012

Part I - The Breastfeeding, Pumping, Working Mom

If there's one thing I'm incredibly passionate about it's breastfeeding. The passion drives me to encourage soon-to-be moms to do as much research as possible during pregnancy so that when baby comes along you can be more prepared to give your baby the best in the early days.

But let me skip past the early days/weeks of initiating and mastering breastfeeding (You can read more about that HERE) and move on to the next major phase for most women: Pumping and Employment. Aside from the lack of support, one of the biggest dilemmas for moms I believe comes from the need for many of us to return to work quite soon after delivery giving the idea that exclusive breastfeeding will be difficult if not impossible to accomplish at that point. 

I say fooey on that! It's so possible, and in fact, it is a protected right! 

My goal here is to give you tips, in a 2 part blog series, that will help you prepare for a breastfeeding, pumping and working lifestyle AND be successful at it! 

You CAN be Superwoman :)

Photobucket

~~~~

The first thing you should do is prepare. Research and get a head start on what you'll need to do BEFORE delivery of your baby so you have less to worry about AFTER.
  • Choosing the pump - http://www.workandpump.com/pumps.htm 
    • *My Choice* Not listed in the above link is the Medela Freestyle. I opted to purchase this pump after looking at extended reviews and am very pleased with the portability and functionality. With my first daughter I had a Medela Pump In Style (PIS) and really loved it as well.
    • Do research on the type of pump you would like. Get familiar with what is on the market, pricing, and see what you think would work best for your situation.
    • Check with your insurance company for reimbursement. From what I gather breast pumps are now considered medical equipment that can be billed to insurance. They may require you to order it from a specific company, or you can buy it yourself and submit receipts. http://kellymom.com/bf/pumpingmoms/pumping/insurance-reimbursement-of-breast-pumps-sample-letter/
    • Breastpumps and breastfeeding accessories are considered tax deductible. If you participate in your employers FSA (Flexible Spending Account) you can use those allocated funds to purchase those items. I typically use Drugstore.com as my general go-to website to help me get an idea of what is FSA eligible. The site is not a complete list of FSA eligible breastfeeding items but it gives you a good idea.
  • Building a stash before you go back to work and learning how to use your pump to get the maximum benefit - http://www.workandpump.com/pumping.htm
    •  You're going to feel engorged in the first week or two after delivery. A good way to build a stash is to periodically pump for short periods when you feel full and store that expressed milk in the freezer for later use.
    • As an added bonus, you never know when you and your significant other or friend might want to go out, or if extenuating circumstances require you to be away from your baby for a period of time. Any amount of milk you have set aside for supplemental feeding is better than nothing, especially if you want to avoid artificial food sources (formula).
  • Be sure to speak with your employer ahead of time to let them know your plans so the appropriate accommodations can be made and everybody can be on the same page when the time comes for you to return to work - http://www.workandpump.com/boss.htm
Photobucket
    • Become familiar with state and federal laws that protect breastfeeding mothers - http://www.ncsl.org/issues-research/health/breastfeeding-state-laws.aspx
    • My employer has been very supportive of my needs with both of my children. I successfully pumped for approximately 10 months (from 12 weeks to about 12 months) with my daughter, and have been pumping for about 2 1/2 weeks back to work already with my 6 1/2 week old son.
  • Educate childcare providers (whether your spouse, a family member, or a day care facility) on proper handling of breastmilk and especially proper bottle feeding of a breastfed baby. 
  • Choosing a feeding method (i.e. spoon, dropper or bottle) - http://kellymom.com/bf/pumpingmoms/feeding-tools/alternative-feeding/ 
    •  Every baby is different. Where some may take a bottle easily, others may not.
    •  My input here consists of the bottles I have tried and recommend. The thing to remember, again, is there is no one baby the same so what works for me may not work for you. Register or purchase a few different kinds of recommended bottles and experiment.
      • My daughter took Playtex Drop-Ins bottles the best. She preferred the latex nipple. The silicone nipple was too slick and she had a hard time hanging on to it. 
      • My son seems so far to prefer the MAM bottles which is the exact opposite style of bottle and nipple to the Playtex Drop-Ins. A good reason why you should have a variety on hand.. you just never know :)

This should be a good start for you in your journey to a successful breastfeeding relationship with your baby, and a successful understanding among friends, family and coworkers about your choice to provide the best nutrition for your baby for as long as possible.

In Part II I will show how I manage working full-time and pumping in order for my son to receive nothing but Mom's milk!


Thursday, October 18, 2012

Welcoming Maddox!

My blog has been oh so neglected here lately, but with good reason! I've been on maternity leave but plan to get back in to the swing of things soon. I can't wait to post about my cloth diapering experience thus far! 

My son's "due date" was September 19th but of course he didn't come that day. I went to work and sulked to myself over how bummed I was... how ready I was to have this baby! I was convinced at that point that he was going to take his sweet time and come 2 weeks late.

But at 5am September 20th I woke up with contractions that felt different. I wasn't convinced it was labor. Ok, I knew it was labor but I didn't truly think I was having a baby that day... the next day maybe, but not that day as you can see here from later in the day when the family decided to go out for a bit. 

Me being a goofus.
IMG_20120920_131558_zpsc1515715

I guess it was pretty serious. I think that photo was taken around 2pm? Wellll....

On September 20th at 6:47pm we welcomed our precious little boy with all his beautiful dark hair in to the world!

100_6064

Maddox James
7 pounds 7 ounces
19 inches long

100_6071

He was born with very little medical intervention aside from regular hospital procedure (fetal monitor, IV... I did have a spinal block to take the edge off. Thank the Lord for that considering a painful something that happened when pushing!), and boy did he come fast! I got to the hospital at 5cm after laboring at home for around 12 hours, and progressed to 10cm just 2 hours later. I pushed for approximately 45min and there he was crying and, according to my husband, peeing on all the nurses LOL. That's my boy... It took about a week before he initiated my husband and I in to the "We've been peed on by our boy" club :p

Mom & Maddox - 1 day old
Photobucket

Dressed and ready for the trip home!
Photobucket

Hanging on tight to Daddy's finger.
Photobucket

Our big girl, Neha, sniffing the new little creature out :)
Uploaded from the Photobucket Android App

Story time with Daddy before bed.
Uploaded from the Photobucket Android App

Family time at the "pone-kin" patch, as my daughter would say :p
Uploaded from the Photobucket Android App

Maddox with big sister Jaiden!
Uploaded from the Photobucket Android App

My handsome man in his gDiaper. I loovvve cloth diapering!
Photobucket

Family photo including Grampa and Mimi!
100_4844

It has been a truly incredible experience as a mother of 2. My daughter is a huge help and loves her little brother so much! We couldn't possibly thank God enough for all he has provided us with and the way he has provided it. 

I'm excited to see what I can do with a little one around again. Maybe it will bring a whole new dynamic to my blog?! 

Wednesday, August 22, 2012

Baby Wearing - My 4 infant carriers for under $60!

Maddox's due date is fast approaching... We're down to less than 30 days!

100_5964

I've been busy the last few days making different baby wearing items to use when he comes along. My goal is always to save money. Truthfully I don't NEED any of this but knowing I can have something "designer" for a fraction of the cost by making it myself makes me feel like I NEED it, and I know they will get used so I don't see any waste in it. Now I just need the cute baby to put in them!

Ok, let's get this baby-wearing party started! 
First, meet my tester babies...

Photobucket
  
BabyBjorn

**UPDATE**
I suppose I knew the Baby Bjorn wasn't a great option. Just never really looked in to it much. Now I'm inadvertently more knowledgable on the subject. If you simply do a Google search on the dangers of Baby Bjorn style carriers you'll get the hint really quickly. Use this with discretion if you choose to do so.

Ok, one thing I can't really make is a BabyBjorn carrier, but it falls in to the baby wearing category so I wanted to share my awesome find. Secretly I have wanted one of these since the early beginnings of my pregnancy. There are several different styles and prices starting around $55 if you wish to buy new.

100_5982 

While at a kids consignment store a while back I found one on a rack with their baby carriers. I ignored it because I didn't really think we needed it until DH realized our old Snugli had pink accents. I told him about the black BabyBjorn I had seen so we took off to the store hoping it'd still be there.

Thankfully it was still there and after using $10 left on a gift card we only paid $10 out of pocket for a great-looking BabyBjorn Original!


Moby Wrap

The Moby Wrap is definitely my "thing." Making your own Moby is incredibly easy. The hardest part is dealing with a ton of fabric but it's a minimal sacrifice for the savings!

Price out knit fabric first. I was able to buy mine for $5 a yard on an end of bolt discount table. I bought the whole 7yds that was left. Keep in mind when pricing it out that 5yds of fabric from the bolt will make 2 wraps as long as it's at least 40 inches wide. Unless you are buying some outrageously expensive knit you will probably not exceed the retail price of a Moby and making one will still be totally worth it.

I don't really know what my knit is technically called.. it's a very soft maybe medium weight(?) knit that stretches width-wise. In doing research I'm finding the best support comes in a 2-way stretch in the width rather than a 4-way stretch in both length and width. If it stretches in length the fabric is going to loosen up and give a little more over time and you may find yourself adjusting it.

You don't even need to have sewing skills to make this wrap unless you wish to serge the edges and/or add a fabric panel. Otherwise it can be simply knit.

To make your own you will need:
  • 5 yards of cotton knit fabric cut to about 20-23 inches wide. Mine is about 23" wide. My knit was 60in wide so after cutting out my 23" I have plenty left over for another wrap.
  • **Optional** Square of fabric (in my case 24"x24") to use as a supporting/decorative panel. 
  • **Optional** Serger if you want finished edges. I don't have one. I did a test strip to see if I could zig-zag the edges... I do not recommend that. Knit doesn't flow under the presser foot very well on edges so it tended to get bunched up a lot. 
  • Scissors and/or rotary mat
 Elle Apparel has a good visual of the cutting process which is the way I cut mine.
(She uses a 4-way knit if you follow her tutorial and I have not seen any post regarding issues with support from her. Reading the comments in her post got me in to researching the differences and that's how I came up with the conclusion to use a knit that stretches in the width.)

Photobucket

I really love my white Moby Wrap but life reminds me white will probably not look so white forever. This wrap has a more elegant look to it so it might be one I use for special occasions or to be a color-neutral option depending on what I'm wearing.

Photobucket

In order to have another wrap available for more casual use I knew I needed a different color knit but I was not about to go buy more. Rit Dye to the rescue! Never used this stuff before but in order to get what I wanted for a minimal price, dying the fabric was my only option.
You can check out how I dyed all this fabric here!

Moby Wraps cost $45+ depending on the style you want.

The white wrap cost about $15 after adding the fabric panel.
The brown wrap cost about $16 after adding the fabric panel and dying the knit.

100_5964
100_5980  
(I did the best fit I could considering I have a large belly in the way. What you are seeing is the newborn wrapping method so the panel is folded in half to create a pouch for baby.)
~~~~

Ring Sling

To make your own you will need:
  • Between 2 and 2.5 yards of fabric in length and between 25-30in in width. I'm a small framed person so 2 yards x 30in works for me (Fabric FAQ)
  • Coordinating thread
  • 2 Aluminum sling rings appropriate to the weight of your fabric (I used Large 3in rings from www.slingrings.com). I ordered the 3-ring assorted size samples in neutral colors. It'll come with a set of large, medium, and small rings. I think I was given silver large, black medium, and navy small. 
  • Sewing machine
The fabric I purchased is an embroidered fabric so it looks the same on both sides. This works perfectly because the tail of the fabric, once pulled through the rings, will show the back, or wrong side. If it looks the same on both sides it's not really an issue. If it doesn't, you can always choose a coordinating fabric to with the same dimensions to sew on to your fabric, or leave it as-is. Up to you :)

My fabric (what was left on the bolt) was 2yd4in x 60in. I simply cut down the center fold to get my 2yd4in x 30in fabric. Just like with the DIY Moby, once you've cut down the center you essentially have enough left over for another sling. I, however, used a chuck of that leftover fabric to make an elegant panel for my white Moby.

I hemmed my fabric on 3 sides to hide the raw edges. On the short side that will get tucked through the rings I only folded in once. There will be plenty of thick fabric to sew on that end once the rings get put on so one fold is plenty.. the raw edges will not be seen once it is completed.

Adding the rings:
As illustrated in the "fanned/gathered technique" photo from Variations on ring sling shoulders, mark your fabric at 1/2 in, 2in, then 2in again. This will help you to place your rings in the right spot and show what point to fold your fabric to so you can sew it down. 

Photobucket

To make your sling without pleats you have to be patient, pin a lot, and sew through several layers of bunched up fabric. It wasn't so bad but I noticed when I was done the fan was quite wide compared to a pleated fan. I've read that can be uncomfortable over time with the weight of a baby if the fan of the shoulder goes too far down your arm. Makes for less mobility of your arm.

I went back and bunched up the fabric more, sewing along the same line, then moving up and sewing a new line for added security. I even attempted a decorative stitch on top of that 2nd row of stitching. Attempted. It serves its purpose but didn't turn out so great probably because of the amount of uneven fabric it was working through. Good thing it was white thread and not incredibly visible.

Photobucket

Once you have your rings sewn securely in place for the shoulder (may want to do a decorative stitch or go back over with a couple more straight stitches) you can try it on and "thread" your rings! 

This Ring Sling cost me about $10.

100_5958

~~~~

If I had went out and purchased a brand new BabyBjorn, 2 Moby Wraps, and a Ring Sling I'd be looking at over $200 worth of products. I'm very happy to have a variety of carriers for under $60!


~Lisa~